How To Create A Grid Accent Wall
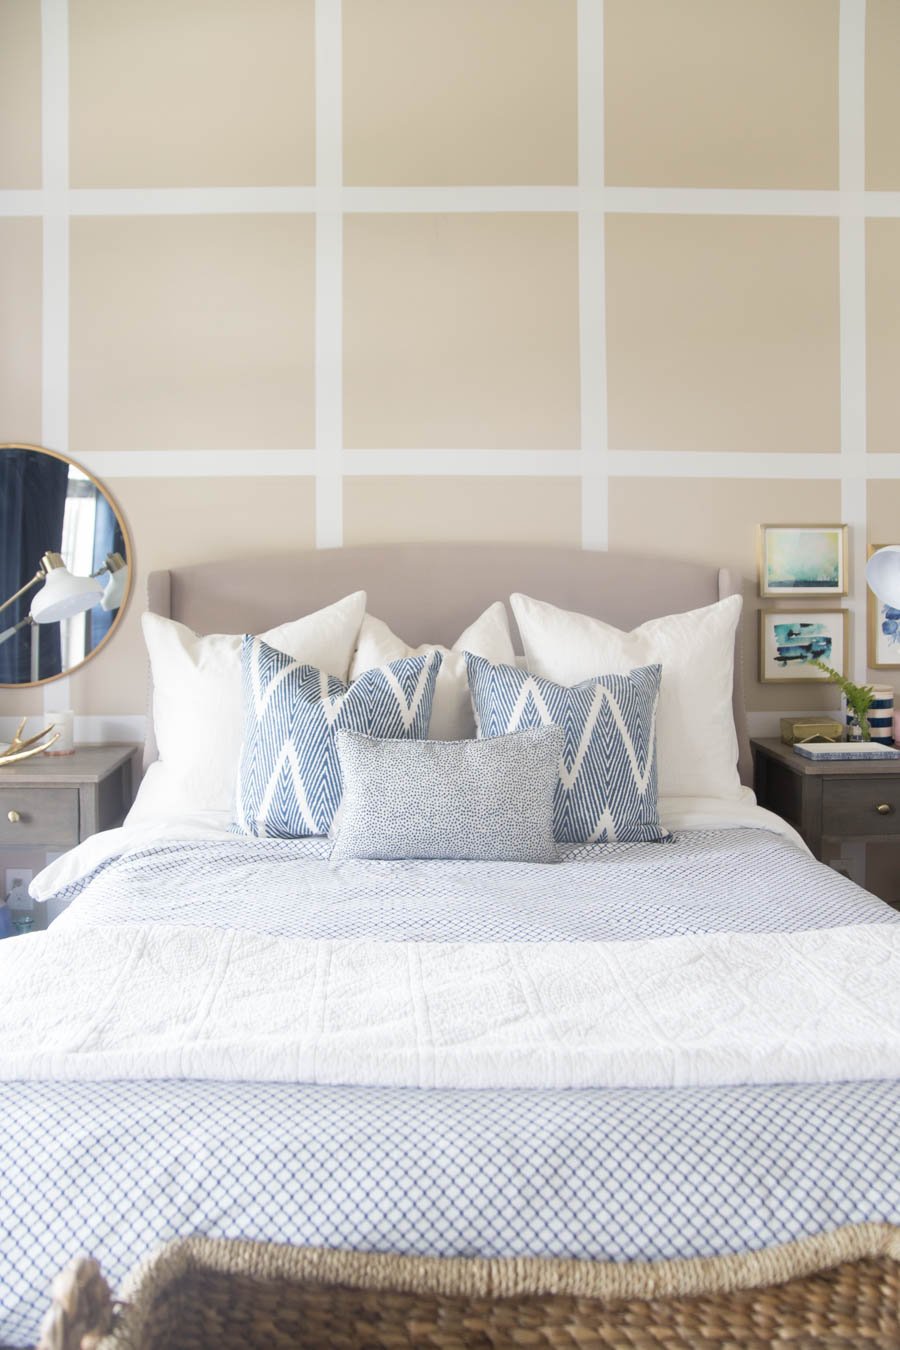
Hey friend, I promised I would share a tutorial for the grid accent wall I showed you yesterday with the Master Bedroom room reveal, and today I’m going to! When I decided to finish the master bedroom I knew right off the bat I wanted to do some sort of accent wall behind the bed. I was afraid with a wall this large that anything I put on the wall above the bed might look way off scale so doing an accent or a feature wall made way more sense. I’m so glad I decided on this grid accent wall because it turned out amazing (in my humble opinion, of course).

My very favorite feature about this grid accent wall is that it is easily removable making it totally renter friendly. We had already painted the walls in here [Gravelstone by Behr] so all we need to do was throw up the grid. If you are a renter or even a homeowner, like me, in a temporary situation this will work wonderfully to transform your space without a ton of effort.
For your convenience, this post may contain affiliate links. That means, at no additional cost to you, I may make a small commission on your purchase. . Click here to read my full disclosure policy.
Supplies:
Calculator (unless you are a total math wiz, which I am not.)
Tape Measure
Level
3 in. Easy Stripe in white (we used three rolls)
Disclosure: I am not a total math wiz so I did consult my high school math teather mom to help me out with the numbers here.
The first thing you have to do is measure your wall height and width. Then divide each by the number of rows/columns you want in your grid. I ended up doing 5 columns across and 4 rows down with each box being approximately 27 1/4 square. To get the math to work out each of the outside column of boxes are an 1/8th of an inch larger than the rest.
I did a quick sketch to help me visualize but pretty much I took the total number of inches for the width of the wall – subtracted 3 in for every row of Easy Stripe I was using (6 across in my case) and then divided that number by the number of boxes in that row (5 in my case). I did the same with boxes going down.
After I had my math figured out, I drew a straight line across the wall to be my reference line. I started with the vertical stripes so, along my reference line, I made marks on the center of where each stripe would go for all six stripes.  Once the marks were drawn, I used my laser level to get a perfectly straight line (at this point we realized that it would be difficult to line the stripe centers along the line so we moved the mark over an inch and a half to the left so we could line the stripe up directly at the level line).
  Then, with Matt up high on the latter and me on the floor, we used a chalk line to create a perfect line on the wall. We used this line to line up the Easy Stripe. You can see the blue chalk line in this photo. It wasn’t perfect accurate at getting right on the level line but it did a great job at getting the line very straight. Some of the lines may have ended up off by less than one 16th of an inch and I was okay with that.
 After the chalk line was drawn, We started at the top with the Easy Stripe, and worked our way down. Matt lined the stripe up along the chalk line while I gently peeled the backing off.

The Easy Stripe was great to work with because it was easy to readjust but didn’t lose its stickiness.
We continued across the room doing the vertical stripes. Then we did the same method to do the horizontal stripes. Only this time we used the stripes we already had as our points of reference. When we added the horizontal lines, we put them directly over the vertical ones. I thought it would be too difficult to do it in pieces. The nice long strips seemed to work fairly easily.

Working together, we had the entire project done in about three and a half hours.
I think the grid accent wall makes a huge impact with really very little money or effort. I’m so excited about the way it turned out!
Thank you to Walls Need Love for providing me with a few rolls of Easy Stripe so I could complete this awesome project!


That turned out fantastic. Thanks for sharing!