How to Install Peel and Stick Wallpaper
If they gave badges for rental home decorating I would have easily earned a dozen by now and I can add the “install removable wallpaper” badge to my collection. To be honest, I think I probably rate an expert badge in this category at this point because I’ve done it now in multiple homes. It’s safe to say that I’m a big fan.

Installing Peel and Stick Wallpaper
The latest installation of removable wallpaper was in our bedroom a couple of months ago. I thought it would be nice to share some tips by sharing a tutorial on how to easily install peel and stick wallpaper.
Tips before you begin
My first tip is to shop around for the perfect removable wallpaper. Not all peel and stick wallpaper is created equal. It can be a challenge to find affordable removable wallpaper especially one that is high quality and pretty enough to actually put on the walls.
Where to find removable wallpaper
I found Amazon to be a pretty good resource while shopping. While on the hunt, I relied heavily on reviews. I read probably a hundred reviews or more before making the decision on this particular wallpaper. I’m really happy with the paper I selected. It didn’t come without issues but overall, I’m really happy with the way it turned out in our space.
How much wallpaper to buy
Before the installation of peel and stick wallpaper make sure you order more wallpaper than you think you’ll need. You can use online calculators to give you an idea of how much wallpaper you’ll need. I ended up purchasing 8 rolls for my wall that’s 14 ft long and 8 ft tall. I ended up only needing six of those rolls. If you have wallpaper with a pattern like the one I chose, you’ll have a bit of waste from lining up the pattern.
Additional supplies needed
Some other things you’ll need for the installation are a step stool, a sharp craft knife, and a credit card for smoothing out bubbles.

Prepping for installation
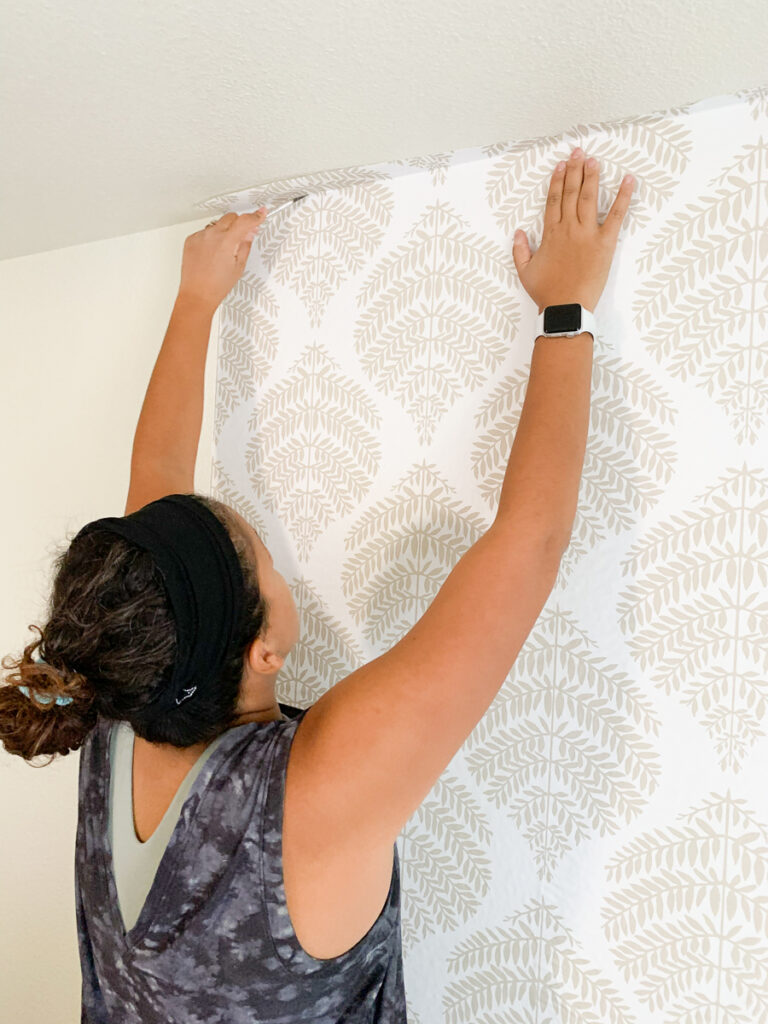
To get started make sure you wipe the walls down pretty well. I dusted the wall with a dry cloth and then wiped it down with a damp cloth. Once dry, we were ready to install the wallpaper. I think this job is easier with two sets of hands but it’s totally doable if you’re on your own. Now you’ll have to decide where to start on your wall. I started on one end but because of that, we had just a slim sliver of paper once we got to the other end.
If I could do it over I would have started in the middle and worked my way out. It’s best to measure the wall and figure out how many full panels you’ll have space for and what will be leftover.

Helpful tips for smooth installation
Matt and I worked together to hang the peel and stick wallpaper. We started by peeling back about a half-foot of the wallpaper and stuck it firmly to the top of the wall right in the corner. I peeled back the backing while Matt scraped the wall with a credit card to smooth out the wallpaper, securing the paper to the wall and pushing out any air bubbles. The first strip placement was a bit frustrating because it was tough to get it lined up without bubbles. We would just peel it away from the wall and reset every couple of feet until we made it to the bottom of the strip.

Once we got to the bottom, we scraped the papered wall with a credit card and then made a clean cut where the wallpaper meets the baseboard using a utility knife.
To install the next strip of wallpaper, you have to line up the pattern. To do so, we had to trim a bit from the top. I cut a strip with some space on the top and then we lined it up the best we could. I will say, the wallpaper I got wasn’t printed perfectly.
Looking super duper closely you can see that in some places the pattern doesn’t completely line up. Perfection is not your friend during this installation – I promise, it won’t be noticeable. Using the same method as the first strip, we worked our way down securing it to the wall with the credit card and then trimming the ends with a craft knife.

Things to avoid
After the first couple of strips of wallpaper, we were rocking and rolling. Before we knew it we were on our last strip of paper which ended up being about a four-inch strip. This was the trickiest part of the installation. Remember, early I said if I could do this over I would start in the middle and work my way out – this is exactly why. You want to avoid having a small thin strip like this to work with.
I cut the strip to about six inches wide so when it was stuck to the wall there was a bit of slack on the side that we trimmed with the craft knife.
If your wall has any outlets you’ll have to remove the outlet cover and cut a small hole to fit around the outlet and then replace the cover.
In Conclusion
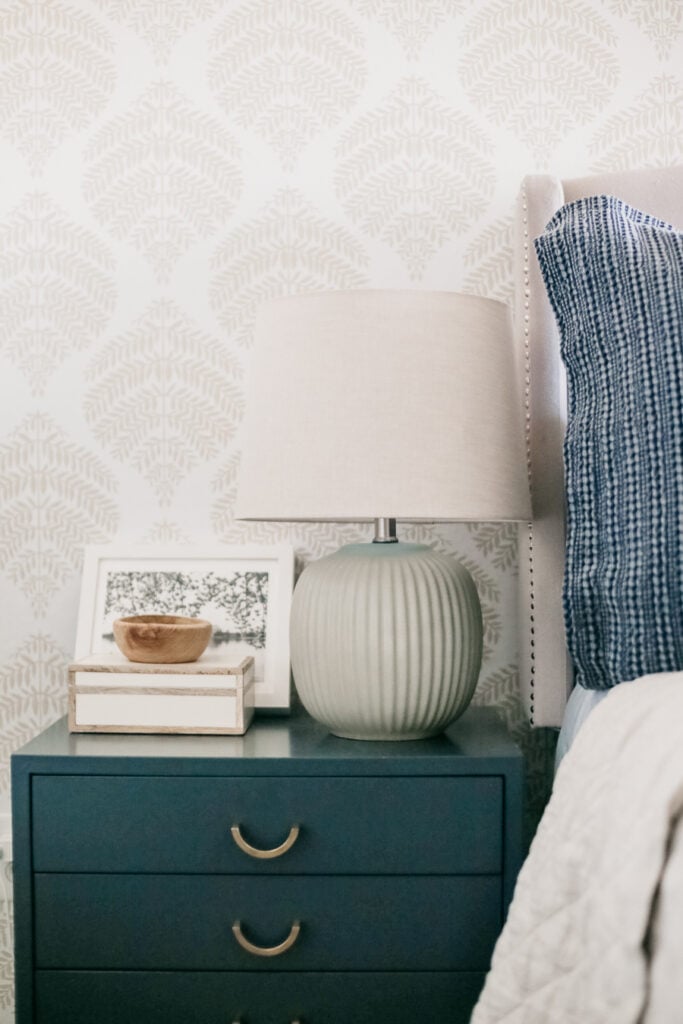
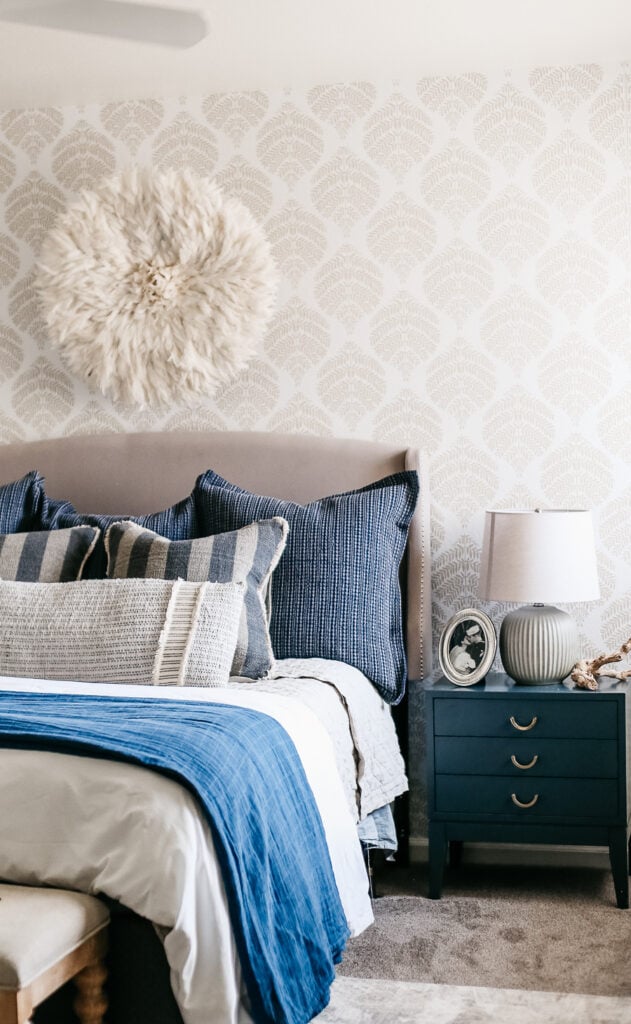
The whole process of installing the peel and stick wallpaper took the two of us about three hours from start to finish and cost about $220. It elevates our space (you can see the whole room here) so much it was worth every penny for this room to look much less like a boring rental and more like a restful retreat! Please let me know if you have any questions.
If you find traditional wallpaper that you just can’t get out of your mind, I have a tutorial on how to make any wallpaper removable if you’re interested in that.
After this post was published I shared some great places to find removable wallpaper. Additionally, if you are looking for more ideas for temporary ways to decorate your walls, here are 7 things renters can put on walls.


As a fellow military spouse (now retired) I salute you! I thought you might be a mil spouse when I first saw this post, and I was right! There should be medals for rental home decorating, and you deserve one. So beautiful! I just wish they had this when we were active duty!
Thanks for this tutorial. I am considering adding a papered wall in my home and have never attempted it before. Wish me luck!! I love your wall paper choice…it is lovely:)
You can do it!
how do you remove the wallpaper
You just peel it right off.
Can the peel and stick wallpaper be used permanently? It seems so much simpler than regular wallpaper. Ty
Gracie
Hi Gracie – Sure! I’ve never truly installed permanent wallpaper so I can’t say for sure which is easier but I do like the install of the peel and stick.