• Home
  • Start Here
  • About
  • My Home
    • My Home Tour
    • Paint Colors
  • DIY/Decor
    • Decorating
      • Rental Ideas
      • Budget Decorating
      • My eBook
      • Decorating Tips
      • The Florida House
    • DIY
      • Before & Afters
    • Crafts
    • Organization
    • Holidays
  • Shop
    • Shop my Christmas Decor
    • Shop Our Home
    • Shop My Instagram
    • Favorite Throw Pillows
  • Media
    • Contact Me
    • Advertise
    • Disclosure
  • Nav Social Menu

    • Facebook
    • Instagram
    • Pinterest
    • Twitter

Making Home Base

  • Home Tour
  • DIY Projects
  • Shop Our Home
    • Shop My Instagram
    • Favorite Throw Pillows
  • Shop My Holiday Decor

Decorating Freebies

Sign up for FREE access to the vault of a dozen decorating freebies from planning printables to decorative wall prints.

November 12, 2013 20 Comments

DIY Hanging Chalkboard

Filed Under: chalkboard, DIY, home decor, Living Room, My Home, spray paint, tutorial, Wood 20 Comments

1254shares
  • Share
  • Tweet

We’ve been doing a lot of little projects around our home to make it more us. Painting alone helped a lot; now it’s all about accessorizing. There was a blank space on the same wall as the media stand and I thought a custom chalkboard would be perfect for that space. Ever since doing our custom framed map, I’m sort of obsessed with making frames. This one is a little different because of the hanging element. The space I had to play with was a bit tall and narrow so instead of making a super long chalkboard, I made a semi long hanging chalkboard. Adding the chain gives a little more length to fill the space perfectly.

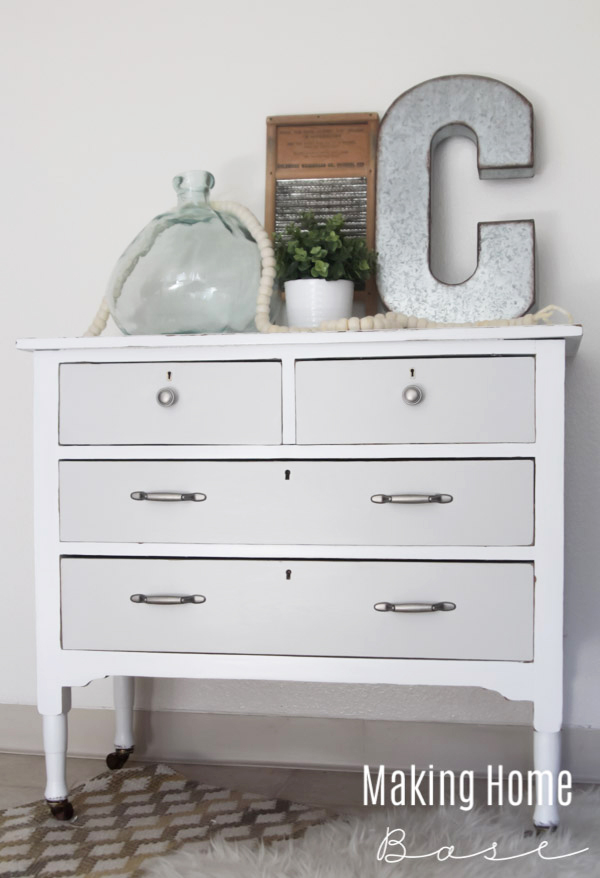
Remember last week when I used a chalkboard in my centerpiece, this is that chalkboard! Today, I’m sharing the tutorial for how it’s made.

Disclaimer: I’m not sure if this is the proper way as we aren’t professionals just a couple of DIY wannabes who like to play with wood and stain šŸ™‚

DIY Custom Hanging Chalkboard

DIY Hanging Chalkboard Materials Needed:

Wood boards (.375 x 1.5)

Project Plywood Panel (cut to fit frame)

Wood stain

Chalkboard Paint (spray paint is super easy and quick for this)

Instructions:

We purchased three 36 in long .375 x 1.5 in boards and cut four pieces (2 pieces at 35 in. and 2 pieces at 13.5 in.) with 45 degree angle.

DIY Chalkboard Tutorial

Using stainable wood glue attach the corners of one long piece to one short piece. Do both sides so you’ll have two L shape pieces. Use clamps to hold the pieces together while they dry. I allowed them to dry overnight. Once they are dry remove the clamps and glue together the other two corners (so now you’ll have a complete frame). Again, use clamps to hold it while the glue dries.

Hanging ChalkboardWhile your frame is drying you can get your chalkboard ready. I used a large piece of project plywood. I had Home Depot cut the board down for me so that it was slightly smaller than my frame. They cut it to 33 x 11.5. I lightly sanded the board, and wiped it down to remove any remaining dust. Then, I sprayed it with chalkboard paint. I sprayed three coats allowing it to dry completely between coats.

chalkboard tutorial After your frame is dry and the pieces are all attached you can add some stapes to the edges if you’d like but it should be secure enough with the wood glue. Next, stain your frame with your stain of choice. I love this stain, it’s Mixwax dark walnut.Hanging Chalkboard TutorialTo attach the chalkboard to the frame I used some heavy duty staples and my staple gun and ran staples all around the edges every few inches.

Hanging Chalkboard Tutorial DIYFor the hanging portion: I bought a chain from the hardware store. (Sorry I don’t have a photo) It was bluehawk brand and came with about 50 feet or so of chain. I snipped off about a foot and a half to use for this project. To attach the chain I used a couple of cup hook screws. I first spray painted them black so they would match the black chain I used. I screwed into the top of the frame and hung the chain from them.

Hanging Chalkboard DIY Tutorial And that’s it. I think I’m going to have so much fun on different holidays with this chalkboard. For now it has a bunch of numbers that are special to our family (our wedding date and our daughter’s birthday) but I love that it looks like it could be anything from a passcode to a scoreboard.

If you like this project be sure to check out my other chalkboard projects!

Oh and if you’re on Instagram be sure to hop over and say hello!

Sharing this project at Savvy Southern Style

Related Posts

  • How to Bleach Wood FurnitureHow to Bleach Wood Furniture
  • How to Install Removable WallpaperHow to Install Removable Wallpaper
  • How to Add a Peel and Stick Kitchen Backsplash in a RentalHow to Add a Peel and Stick Kitchen Backsplash in a Rental
  • DIY Framed CorkboardDIY Framed Corkboard
  • Peel and Stick Backsplash – Removable and Rental FriendlyPeel and Stick Backsplash – Removable and Rental Friendly

About Chelsea

Chelsea Coulston is the resident decorator, baker, and pillow hoarder around these parts. A wife to an active duty Sailor and mom of two girls, Chelsea's got a knack for decorating even the most challenging spaces (just see her military base house!) She's inspired by cool beach tones and warm natural elements that remind you of a day at the beach. After living in a half dozen rentals, she's enjoyed spending the last few years in a cute ranch style home that she and her husband have almost completely renovated themselves. Chelsea lives in sunny Jacksonville, Florida with her husband and two daughters.

Previous Post: « Paper Christmas Lights Garland Door Hanging
Next Post: Holiday Desserts: Coconut Marshmallow Brownies »

Reader Interactions

Comments

  1. Gloria // Simply Gloria says

    November 12, 2013 at 4:12 pm

    Chelsea, I love your tutorial. I’m such a visual kind of person and has to see the step by step action to actually get the motivation to do this…and I love this chalkboard. Very creative!

    Reply
  2. marj bryen says

    November 12, 2013 at 4:53 pm

    you have great ideas enjoy your work and tutorials

    Reply
  3. Susan @SugarBeans says

    November 13, 2013 at 5:20 am

    Great chalkboard! And i love the meanings of the numbers posted. I know there will be lots of creativity happening around that board:)
    xox

    Reply
  4. Liz says

    November 13, 2013 at 10:04 am

    Amazing idea/tutorial! I love the rustic look of the wood and the chain gives it a great industrial touch (my two favorite styles). I am in the process of decorating my own office and this is definitely top on my list of things to do! Thanks for the tutorial!

    Reply
  5. Kennesha says

    November 13, 2013 at 8:09 pm

    Loving this! Thanks so much for sharing the inspiration! Happy Wednesday! Sure hope you will stop by my place as well! XO Kennesha from Restoration House Interiors

    Reply
  6. Jennifer Dawn says

    November 14, 2013 at 8:34 am

    What a great project! I actually want a hanging chalkboard in my kitchen. I’d love for you to add it to my weekly link party! Hope to see you there! http://www.thelifeofjenniferdawn.com/2013/11/a-little-bird-told-me-link-party-67.html

    Reply
  7. Abby @ Just a Girl and Her Blog says

    November 14, 2013 at 7:44 pm

    Cute!!! Now I want to make one! What a great versatile piece! Thanks so much for the tutorial, Chelsea! Hope your week was wonderful!

    ~Abby =)

    Reply
  8. Kelly says

    November 15, 2013 at 7:23 am

    Love this, Chelsea! Thanks so much for sharing. Pinning, stumbling and tweeting! xo

    Reply
  9. Krista @thehappyhousie says

    November 15, 2013 at 11:23 am

    Super cool project Chelsea!! Love the rustic frame around it too.

    Reply
  10. Allison @ The Golden Sycamore says

    November 17, 2013 at 5:48 pm

    LOVE your chalkboard, Chelsea! So pretty! šŸ™‚

    Reply
  11. Bonnie @ Uncommon Designs says

    November 18, 2013 at 4:00 am

    LOVE this Chelsea! Great tutorial. It is perfect for that space and I just love a great chalkboard project and this one is super! Thanks for sharing at Monday Funday. šŸ˜‰ Bonnie

    Reply
  12. Kayla says

    November 19, 2013 at 10:33 am

    I love this! I’m thinking about doing something similar as a to-do list in my Dining room. Great tutorial. I’m hosting a pillow covers giveaway that you should enter. http://homecomingmn.blogspot.com/2013/11/michelle-dwight-designs-pillow-cover.html

    Reply

Leave a Reply Cancel reply

Your email address will not be published. Required fields are marked *

Recipe Rating


Primary Sidebar

Hi! I’m Chelsea!

I'm Chelsea. Wife to Matt, and mama to P and Millie. I'm a fan of making and decorating things and everything blue + white. I believe that there is no such thing as too many throw pillows. Lover of iced coffee and cocktail Fridays. I'm glad you're here.

Follow Along

facebook instagram pinterest twitter

Search

Home Tour

Archives

  • Privacy Policy
  • Annie the Brave
  • How To Start A Blog
Removable wallpaper is a game changer! A couple mo Removable wallpaper is a game changer! A couple months ago Matt and I spent an afternoon slapping this up on our bedroom wall and it completely transformed the space. It can be super hard to put your stamp on a rental but I’m pretty pleased with the way this room turned out! #rentalfriendly #bedroom #milspouse #diyprojects #removablewallpaper #coastaldecor 
Download the LIKEtoKNOW.it shopping app to shop this pic via screenshot http://liketk.it/36TCW #liketkit @liketoknow.it @liketoknow.it.home
#ad Homeschool/General parent ā€œproā€ tip - buy #ad Homeschool/General parent ā€œproā€ tip - buy a shower caddy and stuff it full of art supplies to keep your kids from having their markers and crayons all over the place. For real though, this was a game changer. Previously, I had one hard and heavy caddy for all of our supplies that I would plop on the table during our school day but I found my kids constantly getting up to grab a pink crayon or the blue marker. Or at the end of the day things weren’t getting put away properly and the next day we couldn’t find the glue or the scissors. Now, they each have a caddy that they are responsible for. I’ve partnered with @walmart to share this simple organizing solution. The girls keep their supplies together and carry the caddy around to wherever they choose to school that day/minute. I used my Walmart+ membership again to pull this off. I was able to order all the art caddy necessities online using the W+ free shipping, no order minimum (excludes oversized/freight & Marketplace items) benefit so I can limit my time in stores. #walmartplus
Sitting here thinking about everything that’s go Sitting here thinking about everything that’s gotten me through this last year.
1. My family - having my girls home has been everything I never knew I needed. 
1a. My mom - in those early pandemic days, when we didn’t leave the house, she would meet me halfway between here and Vegas. We would sit in the middle of the desert with our masks on and just visit. I needed that so much and I know she did too.
2. My friends - it’s hard to imagine making it through this year without the friendships I have. They’ve carried me. A small group of neighbors here that would meet at the park for some outdoor fellowship and our weekly dinners made life feel a little more normal. Having regular calls with my best friend in FL was gold especially since we can’t see each other. And regular chats with @bykaithanson got me through especially in those early days.
3. Regular therapy - if I wasn’t already going before all this happened I surely would need to now. This all is very heavy stuff and having someone that is outside your circle to talk to is so important. This saves me again and again.
4. Making bread. I started making last year so when it blew up during that first quarantine I was so excited that we all were baking together. Whenever I’m feeling anxious making dough helps.
5. Exercise - this was the year I finally made exercise a priority. I love how much better I feel when I move my body each day. I’m less anxious and I’m more at peace.
6. All the technology that connects us. Marco Polo, FaceTime, texting, FB Messenger, all of it. Being able to reach all of my loved ones with the tips of my fingers has made it a lot easier when I can’t see them.
7. Television - how many shows have we binged this year? I don’t even know but I remember tackling Friday Night Lights in the beginning of the pandemic and being so sad it was over. 
8. This community. One thing I wanted in 2020 was to CONNECT with you all here and that has happened and its been wonderful getting to know each of you!
šŸ’™
We’ve been through a lot this year what has carried you? Tag a friend that’s gotten you through. 
Hoping and praying for a truly happy new year. šŸ’™šŸ’™
Merry Christmas from our home to yours! I wish you Merry Christmas from our home to yours! I wish you everything good this Christmas and in the new year. šŸŽ„
#ad Fun festive morning with the girls! My girls l #ad Fun festive morning with the girls! My girls love making and baking anything! We made cinnamon roll Christmas trees then decorated them with m&ms and sprinkles. I bought everything from Walmart, used canned cinnamon rolls to make them quick and easy so we could focus our energy on decorating them. Holiday memories made! How are you making memories with your family this season? @walmart http://liketk.it/34rdO #liketkit @liketoknow.it #walmart
I want to hear about your collections!! I don’t I want to hear about your collections!! I don’t collect much but I do have a few Christmas things that I’ve been collecting over the years. These nutcrackers are one. The girls pick out a new one each year. I have a small collection little white village houses and since the first year we were married we bought a peace dove ornament from Pier 1 (Li Bien brand) - they quit selling them so this will be the first in 14 years that we don’t get one of those. What do you collect???

Copyright © 2021 ·Captivating Theme Ā· Genesis Framework by StudioPress Ā· WordPress Ā· Log in

Privacy Policy
This website uses cookies to improve your experience. We'll assume you're ok with this, but you can opt-out if you wish.Accept Read More
Privacy & Cookies Policy
Necessary
Always Enabled