Wood Caddy with Rope Handles for the Bathroom
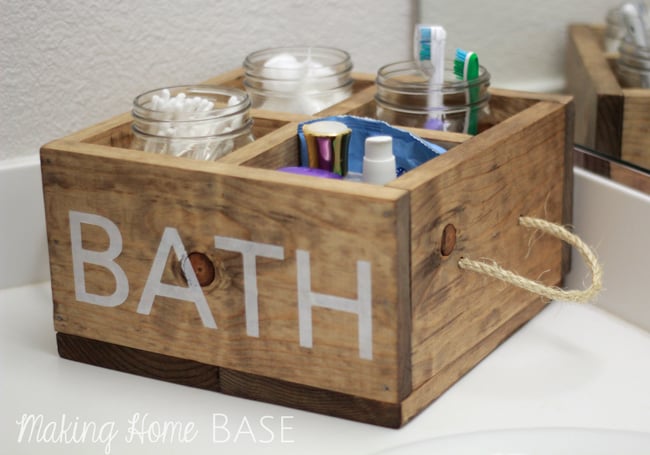
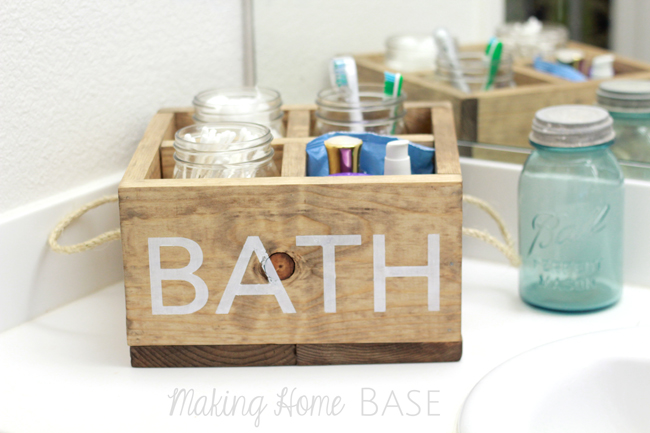
Hey everyone! I hope you are all recovering nicely from your weekend, or your weekend was so relaxing that there is no recovery needed 😉 To start off the week I want to show you guys this DIY Wood Caddy I made to organize my bathroom.

My bathroom before this wood caddy was an embarrassing mess. We just kinda had stuff everywhere, and unfortunately, there isn’t a ton of countertop space to spare. We needed some organization!
I made my caddy using plans from the amazing Ana White. I loved her soda crate caddy and used it as the basis for my own wood caddy.
After the piece was built, I made it my own by adding rope handles and stenciling the front.

I stained the caddy with Minwax Special Walnut, the same stain I used for my DIY Framed Map. I absolutely love this stain!
For the rope handles, I measured and marked my spot for two holes.
Using a 1/4in drill bit I drilled the two holes.
After the holes were drilled, in went the sisal rope on one side. I tied a knot then did the same on the other side.
Lastly, I stenciled “BATH” onto the front. I made the stencil with my Silhouette Cameo and painted the lettering white with acrylic paint.
I finished it with a coat of polyurethane.

It’s so nice having this wood caddy to keep all our bathroom items organized. I placed mason jars filled with q-tips and cotton balls in a couple of the slots. I also used a mason jar as our tooth brush holder in another slot. The fourth slot is used to house my every day toiletries like lotion, moisturizer, and face wipes.
Such a fun DIY wood caddy, and it rescued my bathroom countertops!
So, how do you organize your bathroom items?


Love it Chelsea! Great Job! 🙂
This is so dark adorable Chelsea – I definitely have to check out those anna white plans… I have to make some of these… already thinking of the possibilities!! Pinning! And Sharing on Facebook later today:)
Love it!! Must do it! need it for my kiddos bathroom! Found you via not just a housewife party and am your newest follower ! Hope you can stop by and follow me too 🙂
chris {aka freckle face girl}
This is so, so cute! I am so impressed that you built that! I always defer those jobs to hubby, lol. Now you have my mind spinning with ideas… 😉 Thanks so much for sharing!
~Abby =)
This is fabulous and looks like something I could totally do! Pinned!
tHIS IS JUST LOVELY!!! lOVE THE TOUCH THE ROPE HANDLES ADD!
That is a very cute crate!
Chelsea,
I love that you were able to use mason jars in your one of a kind caddy! We use mason jars to store our toothbrushes too. 🙂
~Sarah
So glad you shared this project as i love caddies of any kind or shape. We make caddies/totes/tool boxes/trugs. I’ve heard them called many things. I’m always looking for new/different ideas to make them. Like to have a good assortment of shapes, styles to offer.
do you live in San Diego? Your reference to Sea World made me wonder. We left S.D. area in 92 but still miss many things San Diego has to offer. Enjoy Happy days
This is awesome Chelsea! I love it, could be one of my favorite projects of yours. Great job.
This is great! I think this would be perfect in my boys’ bathroom!
THis is so cute!! What a neat idea.
Chelsea, This caddy is just perfect for any bathroom. Thanks for sharing. Pinning 🙂
Awesome! I think my bathroom needs one. I love the rope handles.
LOVE this tutorial, Chelsea! The stain looks fantastic – so rustic. Great job!
This is super cute! I would love to have this in my bathroom! Pinned it!
Love the addition of the rope handles and I’m a big fan of nautical themes. Our daughter serves in the Navy as an air traffic controller and the nautical reminds me of her. We are super proud of our “sailor girl”. We also have two sons serving in the Army. Needless to say, we are big supporters of our military men and women. Please thank your husband for his service.
Very cute! Just curious to how much it cost to build this and how long it took you.
Hi Beth, it probably cost less than $10. We purchased one board from The Home Depot (probably about $5) and then I had the sisal rope and paint at home. So I would say $10 if you have to purchase the paint and sisal rope! It took about two hours to complete including dry time for the wood glue.