Organized Craft Cabinet
I’m lucky enough to have a semi-organized living room. We typically don’t keep a lot in our living room with the exception of our basket of blankets that can sometimes get out of hand – our living room has the ability to stay pretty tidy (as long as the girls keep their toys in the playroom). That being said, there was a mess lurking behind the doors of our built in cabinets and it was driving me batty. In this cabinet, we store the girls’ craft supplies. I love having them accessible to them however, they could never find anything. Before the built ins, I stored the craft supplies in my office. Every time they wanted paint or glue I’d have to grab it. The idea of moving the supplies to the cabinet was that they’d be able to grab their own art supplies. Except, the cabinet is in such a condition that they can’t find anything and then I’m summoned to locate the blue scissors or the Incredibles coloring book. No more, little girls! We’ve got an organized craft cabinet now.

Get an Organized Craft Cabinet in 30 Minutes
I encourage the girls to do arts and crafts as much as possible. Bored? Paint a picture for your room. Missing a friend? Make a card for them. Having craft supplies that they don’t have to ask before they use them, just encourages them to use their imaginations and creativity. If you have children that enjoy arts and crafts, setting up a separate, small cabinet for their supplies is really helpful. This is nowhere near all of the craft supplies in our house but these are the most used items that don’t require supervision.
 I started the organization process of this cabinet but removing all of the contents. As I do with all my organization projects, I grouped like items together and decided to store them that way.

Next, I labeled everything. In the before photo, you can see that the cabinet wasn’t really that bad. It was definitely messy. Things weren’t put away properly. There were a few random toys mixed in but we had several bins for different items and like items were sort of grouped together. In fact, I didn’t buy a single bin or container to organize this space. They were already either in this cabinet or floating around our house. The missing element was the labeling. Millie (3) could care less about labels but with a little guidance from Peighton (6) she can easily put things away with proper labeling.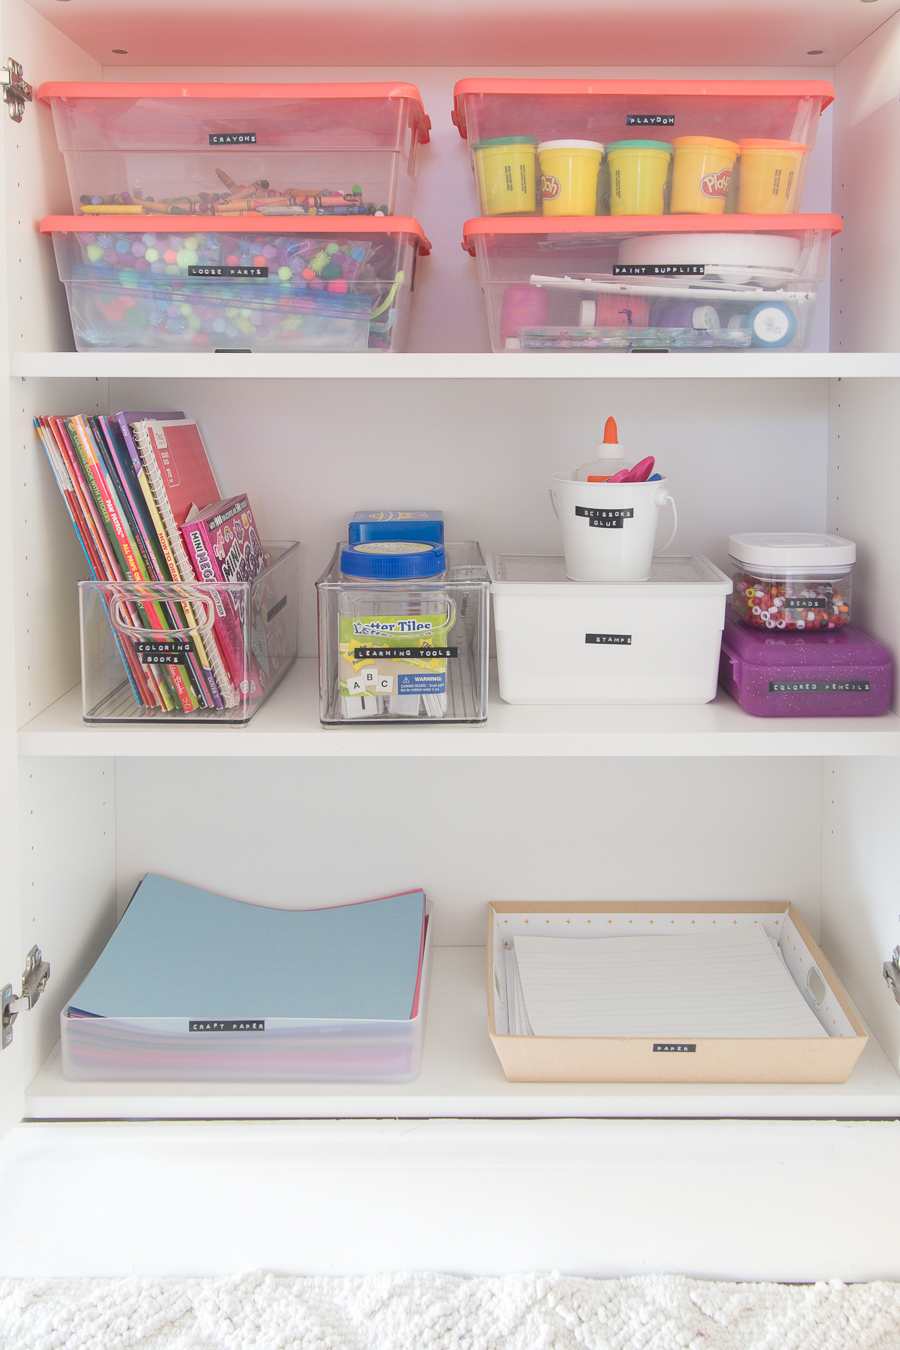
You can see here I used an embossing label maker to make labels for each bin, container, and tray.
Here’s a quick breakdown of my organization system:
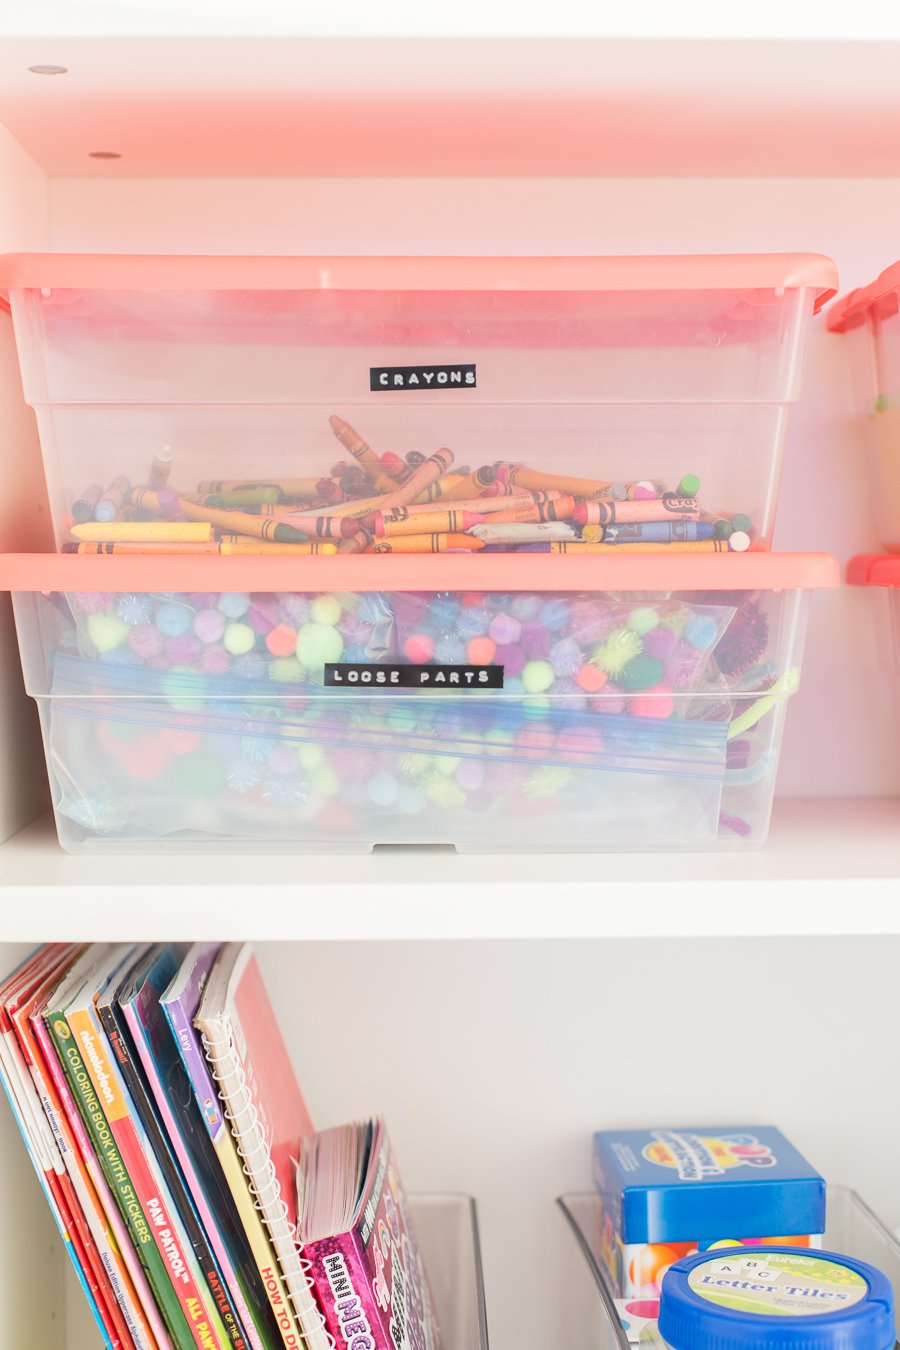
The top shelf has four clear containers with lids that are stackable. These are our most used items in our cabinet. It’s easy for the girls to grab an entire bin, bring it to the table, clean up and replace.
 Inside each container:
– Crayons (We keep a smaller container of crayons separate for homework/school work)
– Playdoh
– Loose Parts (Things kids love to glue on other things like pom poms, pipe cleaners, buttons, googly eyes)
– Paint Supplies (I keep the washable tempera paints and watercolors in here along with paint brushes and plastic paint palettes)


The middle shelf has:
– A clear bin that holds coloring books
– A clear bin that holds learning tools (math games, letter tiles, etc.)
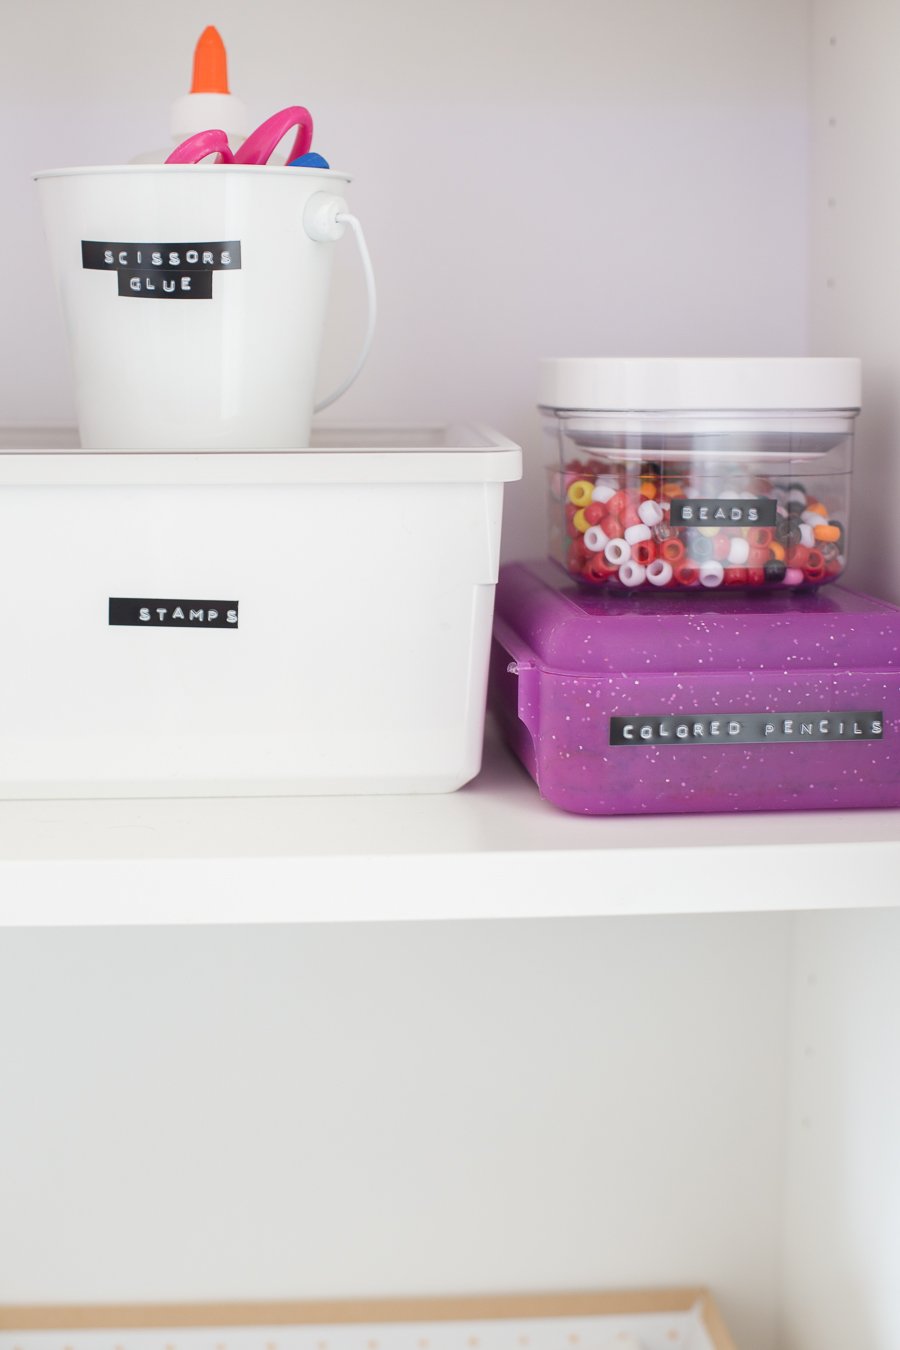
– White bin with a lid that holds stamps
– Pail with scissors and glue (this is easy for them to grab and bring to the table for crafting with loose parts).
– Click tight container of beads (We have a ton of beads but I only allow this small container in the craft cabinet)
– Colored Pencils
The bottom shelf contains:
– A tray with construction paper
– A tray with writing paper
I think these are probably the basics of a kids craft cabinet and as Millie gets a bit older and more responsible (we’ve banned markers after an incident) we likely we use the other set of cabinets in our built-ins for even more craft supplies.
The best part about this organized craft cabinet is that it can be hidden in plain sight. It’s right behind our sofa, the girls can sneak back grab a piece of paper and their bin of crayons and make masterpieces whenever they’d like.

Okay, so here are my main takeaways if you are considering putting one of these organized craft cabinets together for your children.
Use stackable bins that have lids so you can pull out an entire bin – they can pull everything out once they get to the table and put everything back in the bin when they’re done.
Shop your house first. I literally found all of the bins for this cabinet in my house. Most were already in this cabinet, others weren’t being used in other spaces in our home. This ended up being a zero dollar project.
Label everything. I loved this Dymo embossing label maker. It’s really affordable and I prefer it over the gazillion other label makers I’ve used.
Be conservative with what items you allow to be free range. Like I said previously, we have tons of crafts but they are things I prefer to supervise. You won’t see markers, glitter, or even too many beads in here.
This project is a part of the six week Clutter Free Organization Challenge.
More organizing ideas below:
Things to Declutter in Your Living Room
Things to Declutter from Your Kitchen
How to Organize A Small Pantry
Pin the Image Below to Save for Later


![DIY Canvas Entry Table Sign [Tutorial]](https://www.makinghomebase.com/wp-content/uploads/2013/01/entry-table-sign-making-home-base.jpg)


I appreciated this as it is very timely! This is helpful. Do you still recommend the open shelving unit if you do not have a playroom for games/toys? We are renting right now, so I am just trying to figure out what would work best. I find that side tables with pull out drawers for kids tends to end in smashed fingers or drawers left open, etc.
Hi! Our 8 cubby system for the living room was a lifesaver. Having the baskets made for such easy clean up. Now that my girls are order and are in to really, really tiny toys like Shopkins and LOLs – that wouldn’t work as well. We have to have more options to store the small thing. They would get completely lost in the deep baskets we had. So, to answer your question I think it depends. If you have younger children with larger toys, the cubby system will be great!
Thank you Chelsea! My girls are 6 and 8. They like the little trinkets too! We do have quite a bit of doll accessories. One Grandparent found a garage sale and I have an entire tub of 18” doll things, I keep this away for now because the clean up for this can be crazy, but I do want them to have access to these soon. I might need to make our guest room into a playroom space for the dolls with an open shelf unit. They enjoy crafts on a daily basis. I was thinking about the post on organizing the craft closet and would you believe that my girls found a little door with shelves in it that was hidden behind my ‘stuff?” It is right in the kitchen. So, I’m going to use that as a craft closet similar to the ideas that you shared! I was so excited to make that work for a simple art supply cubby like the built ins you shared.