How to Make a Canvas + Paint Your Own Abstract
Here’s a tutorial for creating your own DIY Canvas Painting beginning with a DIY Oversized Canvas made out of a $15 drop cloth. This project is a very budget-friendly way to make high-end-looking custom art.

Living in a rental, I can’t invest $500+ on beautiful large-scale art because we move so frequently I would be concerned that it wouldn’t have a proper place or it might get damaged in a move. I still want beautiful art in my home.
How to Make a Canvas Painting
I’ve made DIY art several times before. I made this DIY abstract piece on plywood a couple of years ago. I’ve done some oversized DIY Typography Art and then of course the beach print that was hanging in the spot on the wall prior to the swap was a photo snapped by yours truly. After living in this home for over a year, I kept looking at this wall and felt like it needed something more impactful above the sofa.
I had been playing around with the idea of a DIY canvas painting for a few weeks but was unsure how I’d tackle it. I’d painted a plywood abstract from scrap wood before but for the size I wanted, I thought that would be too heavy.
Canvas was a great option until I started pricing actual canvases. Even the lowest quality canvases in the largest size cost upwards of $75 and the largest size I found still wasn’t going to be big enough.
It dawned on me that we could make a canvas and paint it so that’s what we did. Today is a two-part tutorial: How I built the canvas and then how to create a canvas painting.
Part 1: How to Make a Custom Canvas
You can make a large-scale custom canvas from a drop cloth and 1x2s.
Supplies you’ll need:
4×8 Drop Cloth (canvas material)
(4) 6ft 1x2s
Brad Nailer with 1in brad nails
Staple Gun

To create your own large-scale artwork, the first step is to make your canvas – deciding first the size canvas you’d like to make. The final measurement for the oversized canvas we built was 36×60. Matt cut the 1x2s to frame out the canvas. Here were cuts: (2) 60 in boards and (4) 35 in boards. We loosely laid them out like above. We did not worry about accurately space the support pieces because none of this would be seen once the drop cloth went over it.


First, add a bit of wood glue to the edge then securing it with the brad nailer.

You’ll notice that we attached the supports with the widest part facing out instead of the on its side like we did the outer pieces of the frame. We thought that this would give allow the dropcloth a little more tautness to prevent it from sinking in. To do this, we took a scrap piece of wood and placed it underneath to get it level with the outer frame, and used the brad nailer to secure it.

The frame was all done and now it’s time to stretch the drop cloth over top to create the canvas.

Right out of the packaging, the drop cloth was pretty wrinkled (not pictured) so I took the time to iron it before we started to attach it to the frame. Since it’s stretched quite a bit over the frame, I’m not 100% sure it was necessary but it’s what I did.

To begin stretching the drop cloth over the frame start by laying the canvas down on the ground with the frame over the top. You’ll start in the middle of one of the long sides, stapling the drop cloth to the frame. For this part of the project, it’s helpful to have an extra set of hands.

You’ll start in the middle, fold about two inches of fabric over the frame, and staple, working your way out to either side stapling every inch or so. Try to keep the fabric relatively even so it doesn’t go wonky when you get to the sides. You’ll want to be sure to leave about two inches or so on either end to make the corner folds.

After you’ve completed the first side, move to the second long side, again, starting in the middle then working your way out. This is when it’s helpful to have an extra set of hands. I held the fabric taut on the one side while Matt tugged and stapled on the other side.

Do the same on the two shorter sides making sure to pull it really snug before stapling the final side. Once all four sides are secure, you should see that the drop cloth is on there really tightly with no slack at all. Now it’s time to fold the corners. This takes a little effort.

You’ll take the extra fabric that is gathered in the corners here to create a nice fold then staple. This will make your sides nice and crisp. This is really hard to explain with words but hopefully, the photos above help you understand better how to make this corner fold. Hold up the corner fabric with one hand. Gently move your fingers closer to the corner, pinching the fabric together until the pinch of your fingers lines up with the top of the wood of the frame. Then, fold the fabric over.

Staple the corners to hold down the fold. Do that on all four corners and cut away any excess fabric with scissors.
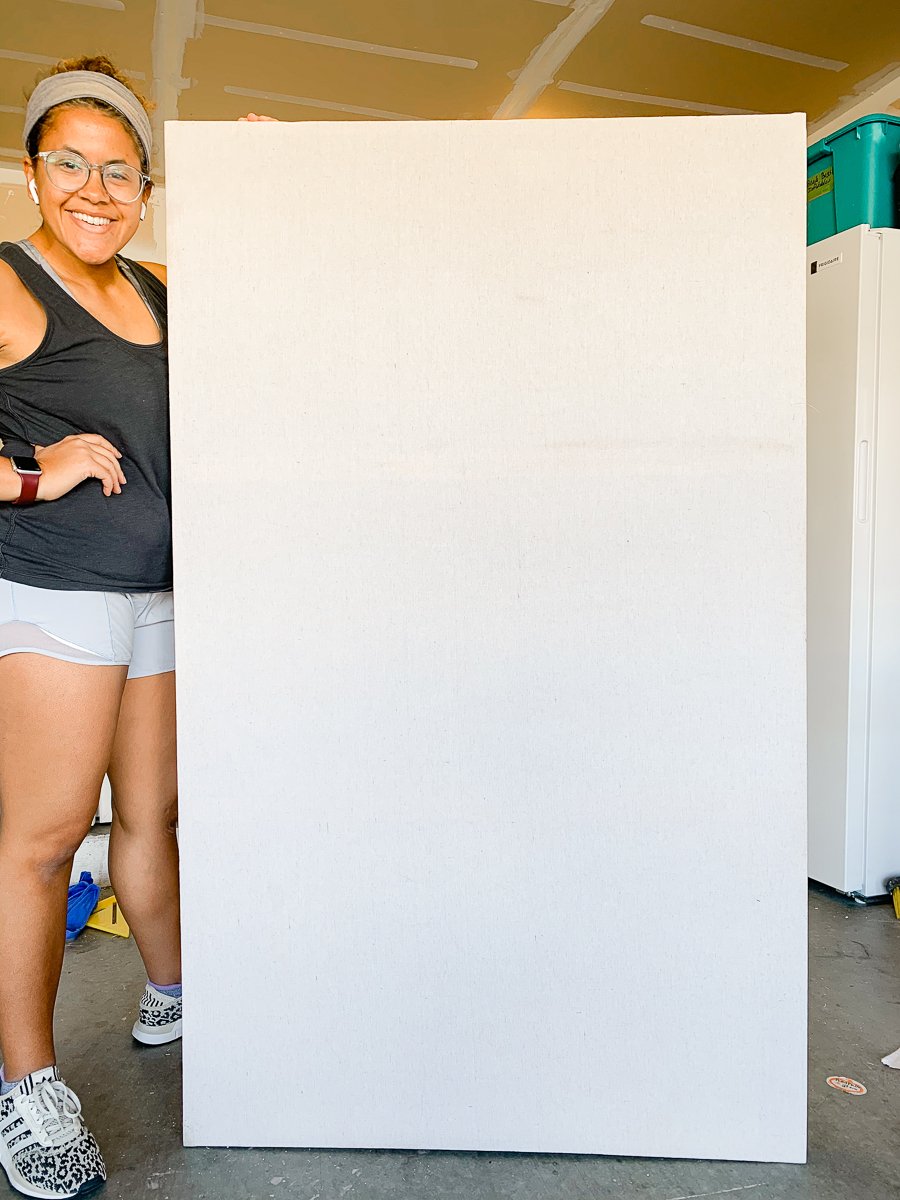
Now you can stand it up and admire your work! Kidding, now it’s time to paint – this is a DIY canvas painting, after all.
Here’s Part 2: How to Paint an abstract canvas
Of course, at this point, you can do whatever painting you’d like but I’ll share with you my super technical (read not technical at all) artistic tutorial of what I did next to give you some inspiration.
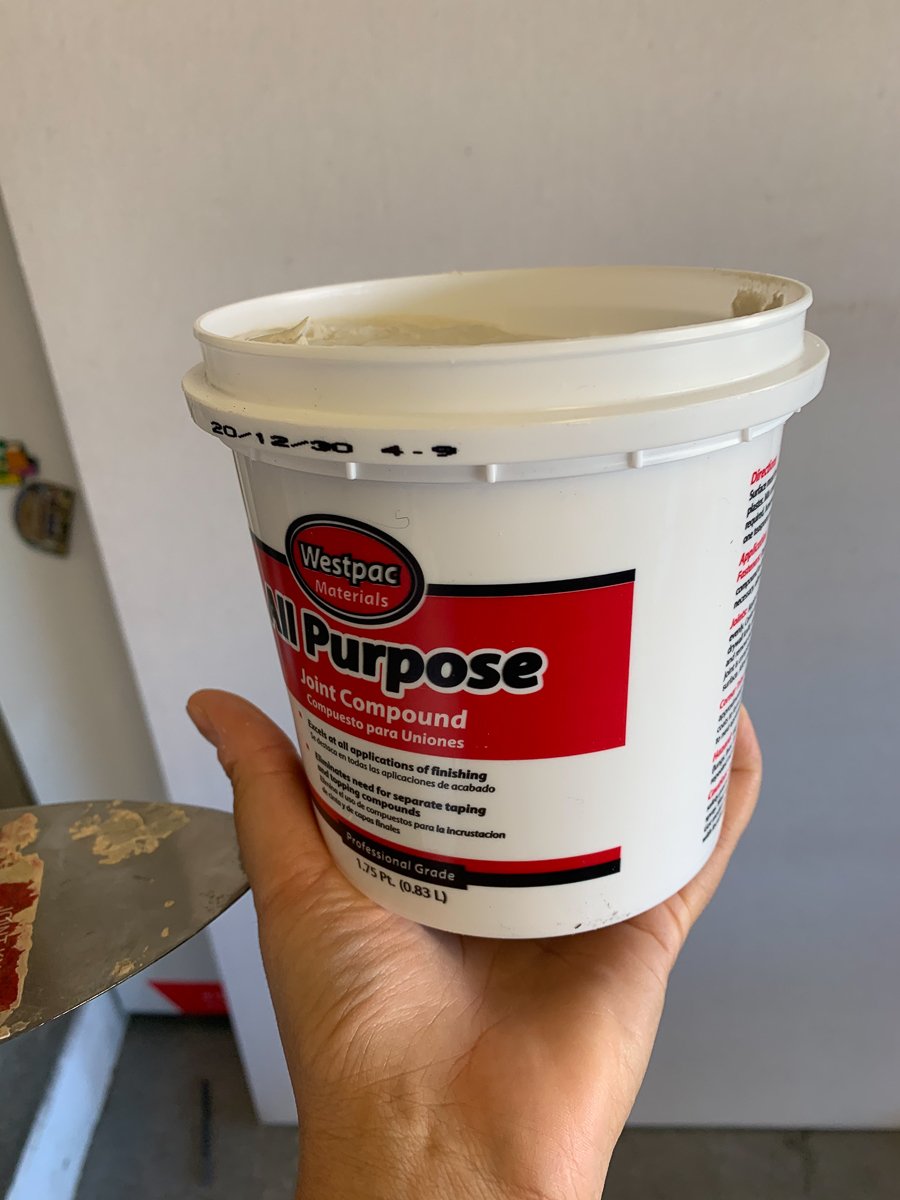
The fabric of the drop cloth, while thick, does not have a super tight weave so if you were to paint directly on it, it would probably need several coats. You can also add a coat of primer or gesso. I planned on adding some texture to my painting from the beginning so I first added a layer of joint compound.
I’m really glad I did because I think it really helped with the overall look of the painting.
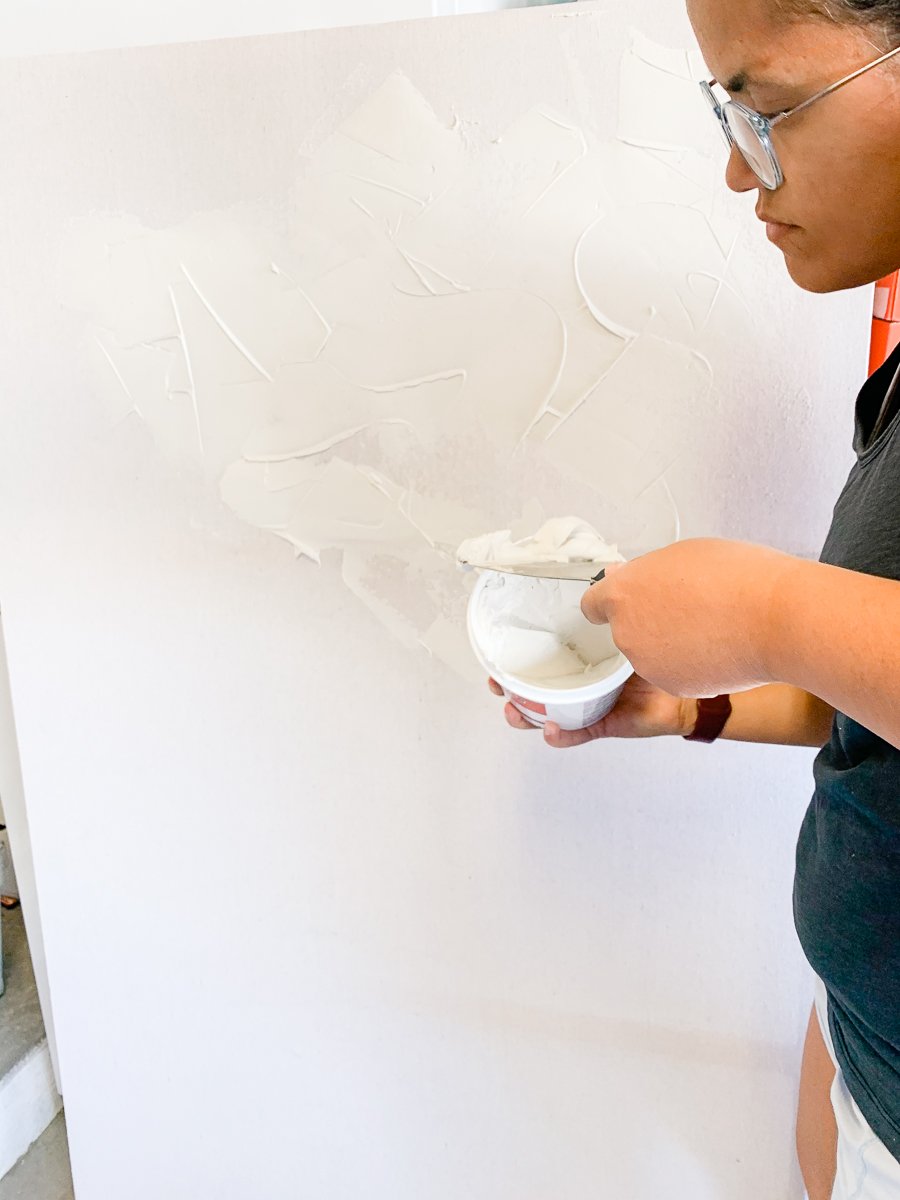
With a two-inch-wide putty knife, I smeared the joint compound all over the canvas. I was really liberal with the joint compound. Leaving some thicker lines of it in places and keeping it a little clearer in other spots.

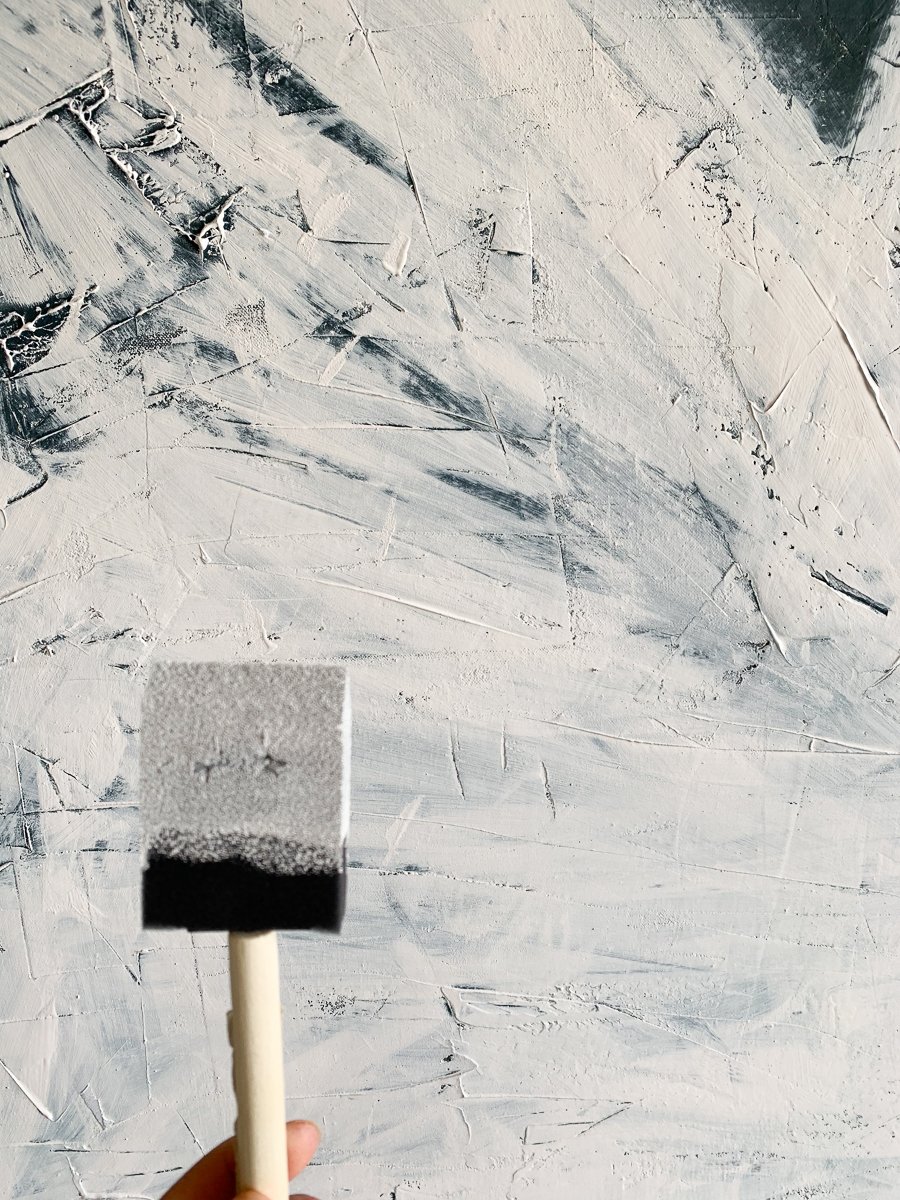
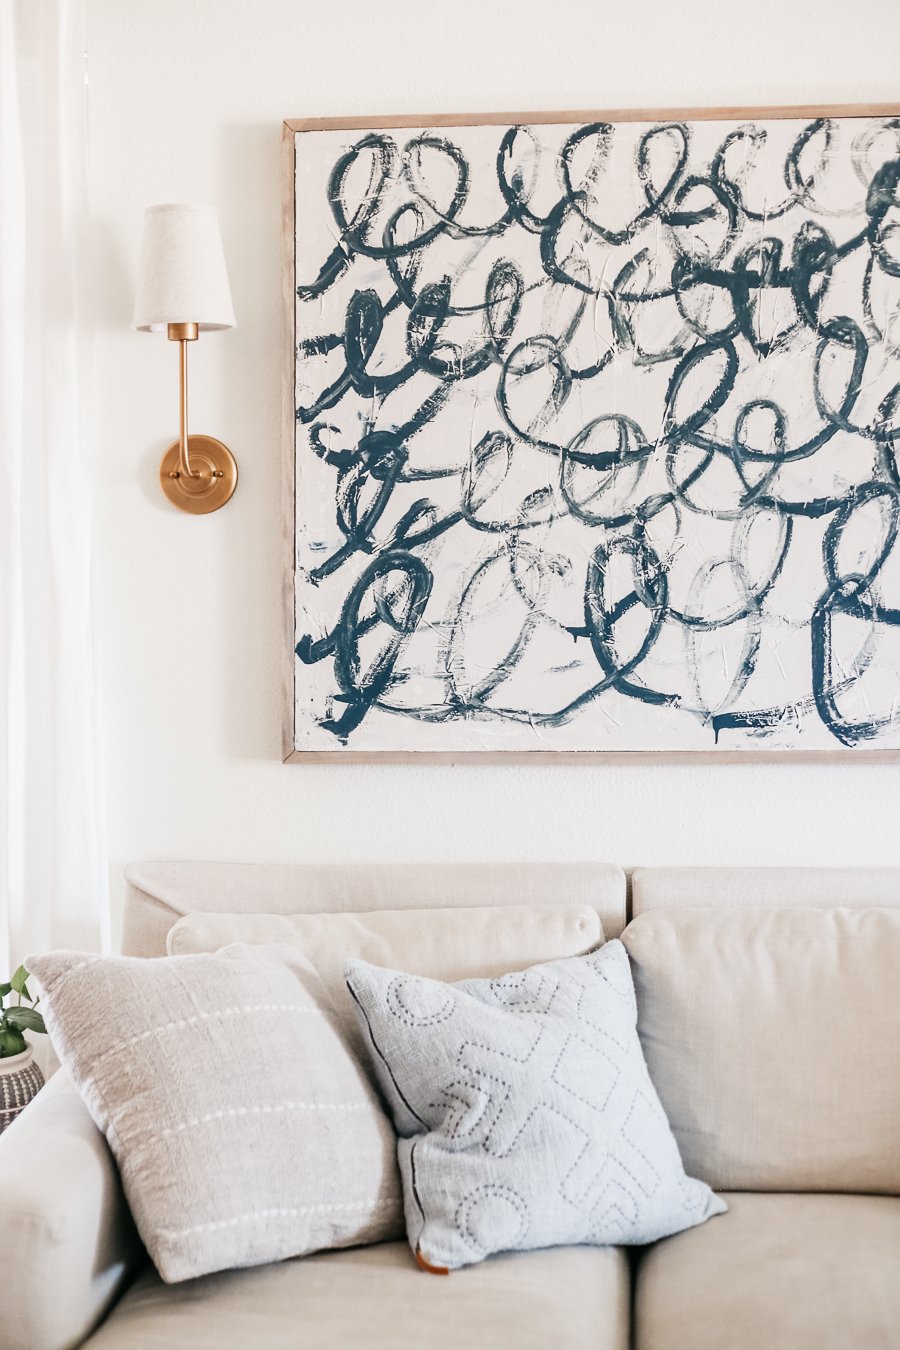
After the joint compound dried, I came back with some dark blue paint. I just used these foam brushes because it’s what I had on hand. I painted the entire canvas with a layer of blue.
After a layer of blue, I painted over it with a layer of white. Then, another layer of a light beige-y white. Several times I came back with the previous color to add a little more in some spaces until I got a layered base that I really liked. After that, I added the loopy swirls. I used a small paintbrush and just free-handed the loops.
My first attempt at this, I didn’t like so I painted over it again with the beige-y white and started over with the loopy swirls, and that time I got it right. It was a perfect piece of art.
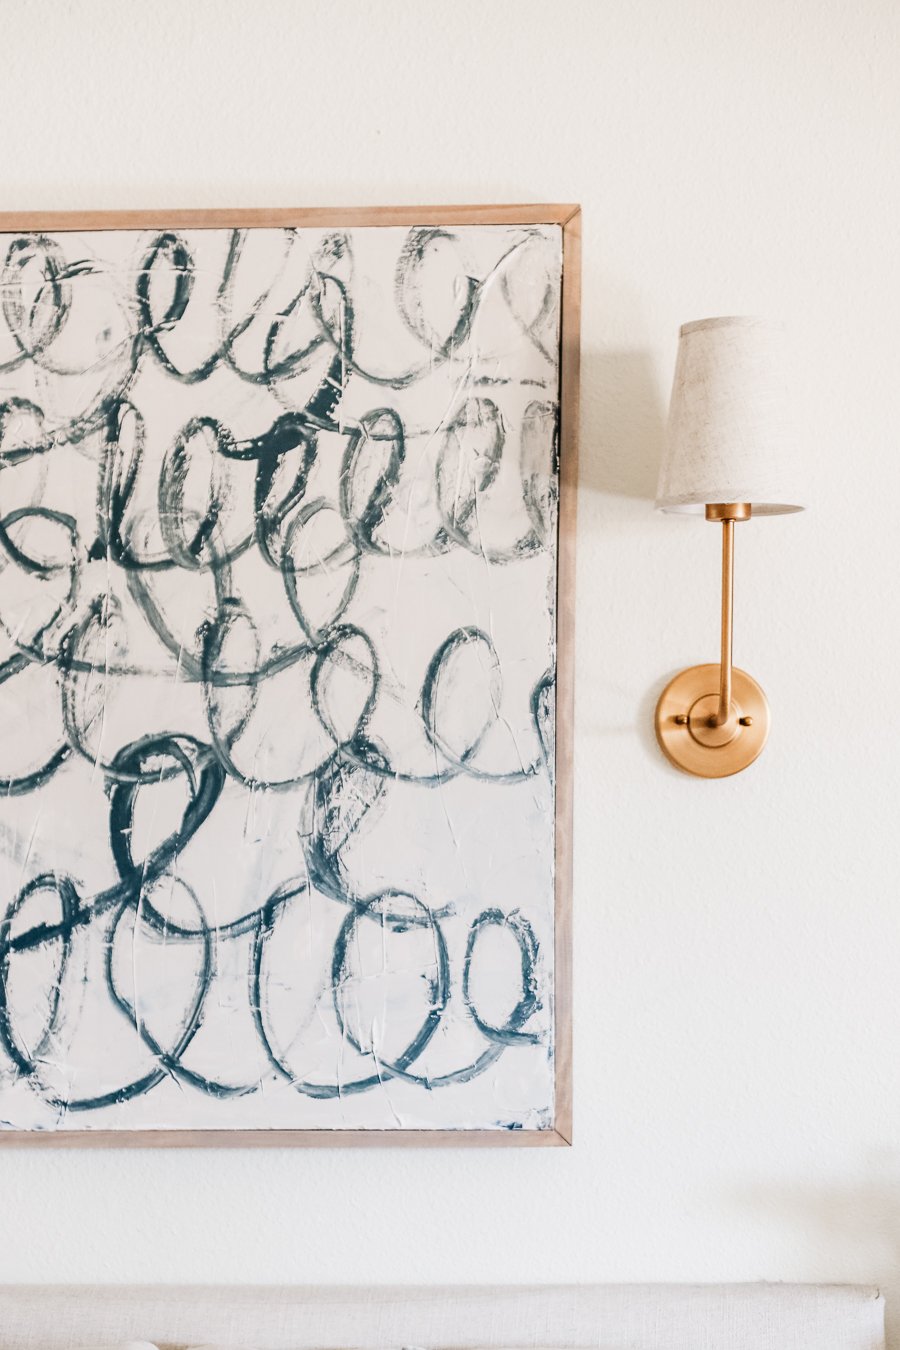
We framed the canvas using a simple mitered corner technique that is featured in this DIY canvas frame tutorial. The only difference is, this time we used the brad nailer and finishing nails to actually attach the canvas to the frame instead of allowing it to just fit snugly around.

We used a combination of these two stains I found at Home Depot. First applying the stain Special Walnut, followed up Sunbleached.

In the photo above you can see the Special Walnut before adding the Sunbleached on the bottom there. On the top, the Sunbleached color has been applied on top of the Special Walnut stain.
I’m so thrilled with how it turned out. This painting is so perfect in this space and I think it elevates the entire room.
It’s one of those things where you didn’t know how much you needed it until you have it.
Can you believe I made that? I made that!


For your convenience, this post may contain affiliate links. That means, at no additional cost to you, I may make a small commission on your purchase. Click here to read my full disclosure policy


Have you ever done a project like this before? I’d love to hear about it.
I’d love for you to share this on Pinterest or Instagram. You can follow me: @makinghomebase. You can also just send this link to someone you think will enjoy it! I appreciate you sharing my projects!
You can also check out my other DIY art projects below:

DIY Abstract Art from Plywood


Okay this is probably a really strange question, but when huge photo canvases were popular, I got one done with a now very-old photo. I’m wondering if I could paint over it?! We still have it in our closet, but it would make the perfect sized piece of art!
Kait, I bet you could do that easily! I can’t see why not.
Hi! I love your project. What type of paint did you use?
I used regular ol paint from Home Depot. I bought a couple sample pots.
That. Is. Incredible!!!
Amazing job, thanks for much for sharing!!