• Home
  • Start Here
  • About
  • My Home
    • My Home Tour
    • Paint Colors
  • DIY/Decor
    • Decorating
      • Rental Ideas
      • Budget Decorating
      • My eBook
      • Decorating Tips
      • The Florida House
    • DIY
      • Before & Afters
    • Crafts
    • Organization
    • Holidays
  • Shop
    • Shop my Christmas Decor
    • Shop Our Home
    • Shop My Instagram
    • Favorite Throw Pillows
  • Media
    • Contact Me
    • Advertise
    • Disclosure
  • Nav Social Menu

    • Facebook
    • Instagram
    • Pinterest
    • Twitter

Making Home Base

  • Home Tour
  • DIY Projects
  • Shop Our Home
    • Shop My Instagram
    • Favorite Throw Pillows
  • Shop My Holiday Decor

Decorating Freebies

Sign up for FREE access to the vault of a dozen decorating freebies from planning printables to decorative wall prints.

September 6, 2016 6 Comments

DIY Abstract Art

Filed Under: budget decorating, DIY, My projects, tutorial, Wood 6 Comments

752shares
  • Share
  • Tweet

Hey friends! I hope you had a great holiday weekend and all you east-coasters faired well during hurricane Hermine! You know when you have a project that you’ve been wanting to try forever but you just never make the time for it? This DIY Abstract Art is that project for me. I’ve been wanting to make my own for probably the better part of a year.
DIY Abstract Art-33

Ever since I made this DIY oversized wall art with plywood, I’ve been scheming other ways to use plywood. It truly makes a great canvas. It’s pretty cheap, The Home Depot will cut it to the dimensions you’d like and you can get multiple projects from a half sheet. We almost always have some plywood pieces hanging around the garage now since we’ve been doing more wood projects. So, when I needed a piece of art for our recent bathroom makeover, this DIY abstract was the perfect solution.

Here’s how I did it:

For your convenience, there are affiliate links below. Simply click the links below to see the items and sale prices. At no cost to you, I may make a small commission on your purchase. Thank you so much for supporting MHB. Click here to read my full disclosure policy.

Supplies:

  • Piece of 1/4 inch birch plywood cut to your preferred size (mine was 24×24)
  • 4-5 paint colors (varying in color – I decided on three light colors and two contrasting colors)
  • Paint brush
  • 6′ 1×1 board (for the frame)
  • Drill (love my Ryobi drill with the ONE battery – so nice having interchangeable batteries!!)
  • Drill bit
  • Screws
  • Minwax Classic Gray Stain

Abstract Art Step by step

Step 1: I mentioned, I used a scrap piece of wood we already had. I quickly sanded it and wiped it down. If you are creating a custom-sized abstract piece, you’ll have to cut your plywood first. If I have a project in mind, I almost always ask my friends at The Home Depot to cut the pieces for me. Such a time saver!

A note about paint colors: I used colors I had in the garage – if you are selecting paint color specifically for this project, consider where it will be hanging and think about using a couple of those colors in the piece. I used the same color that’s on the wall in the bathroom for this abstract and I think that works well.

Step 2: Brush your base color onto the board. I used Pure White as the base. I used the paint sparingly. The brush was not sopping wet with paint, just enough to get a bit of coverage. You don’t need a lot of paint because you want to see brushstrokes and you are putting on multiple layers of color.

Step 3: Brush on your next color. This was a contrasting color. I used a gray (Still Gray – same color as my cabinets). Instead of brushing the entire piece, I just made random strokes all over, still using a fairly dry paint brush.

Step 4: I went back to a light color. I used the same color that’s on the walls in my bathroom, Oyster Shell by Ben Moore. It’s a blue-green gray that’s very light. Again, I made random brush strokes all over. Covering some of the gray but still letting it come through.

Step 5: Another contrast, this time, I used a navy blue.

Step 6: I went back to the Oyster Shell color and covered portions of the darker contrasting colors.

Note: Allow the paint to dry between steps. Since you are dry brushing, the paint should dry fairly quickly

I repeated these steps until I was pleased with the look. The best thing about an abstract is that it doesn’t have to be absolutely perfect. It’s your interpretation of art. And since I can’t even dry a stick figure, I’m happy that there is a form of art just for people like me 🙂

DIY Abstract Art-22

I enlisted Matt’s help with the frame. He cut two pieces the full length of the piece (24 inches) and then cut two more pieces two inches shorter than the full length of the art (22 inches). These were just straight cuts. I think it gives it a more weathered/handmade look than mitered.

DIY Abstract Art-23

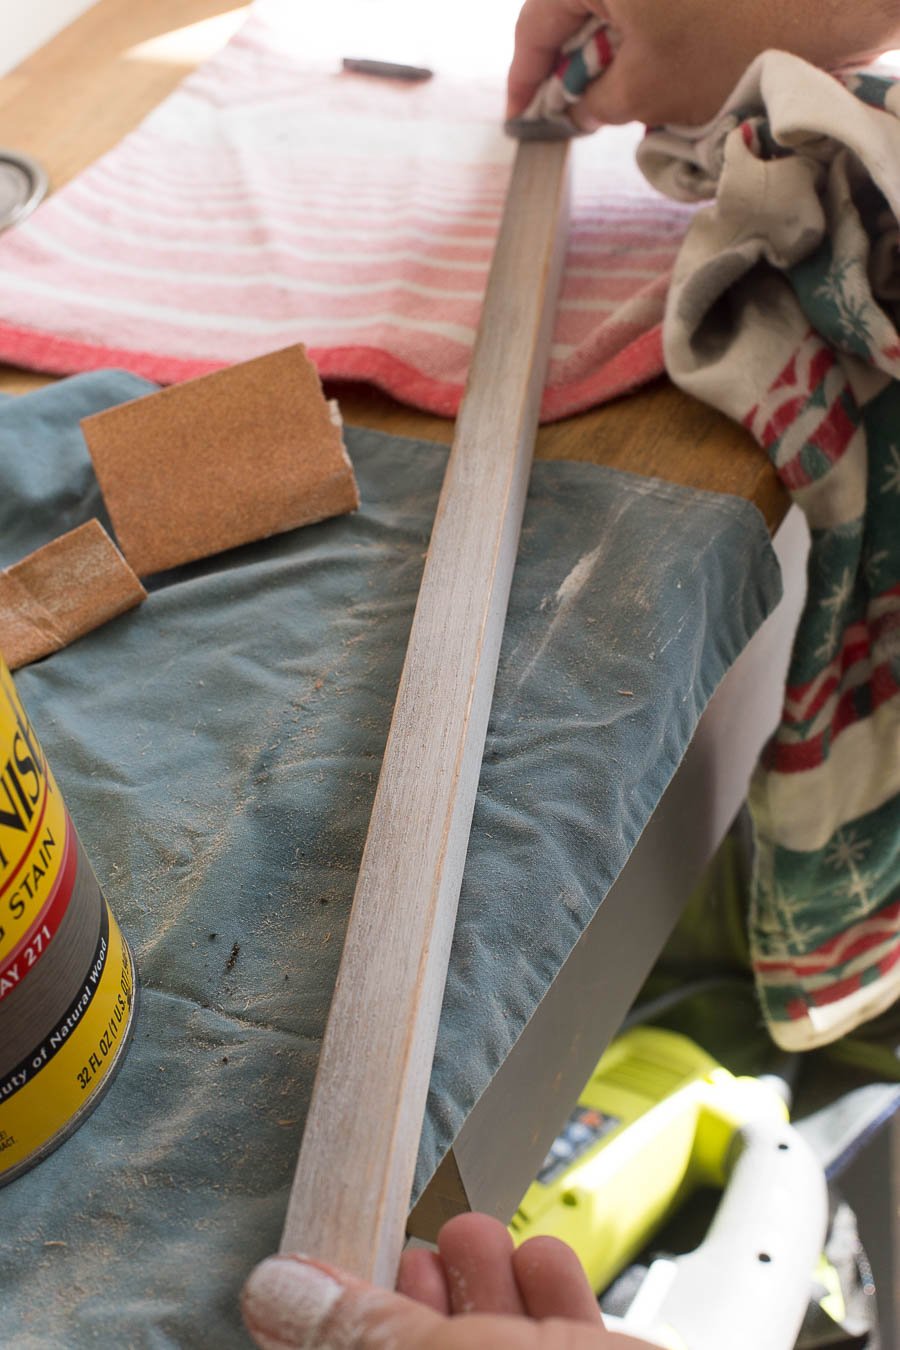
He painted a coat of white paint over the wood, dry brushing it. Then he sanded it to roughen it up a bit.
DIY Abstract Art-24

After that, he rubbed on a coat of Minwax Classic Gray stain.

DIY Abstract Art-26

To assemble the frame – we decided to frame out the plywood by attaching the frame directly to the top of the wood. Matt did that by pre-drilling a few holes with a drill bit slightly smaller than the screw size.

DIY Abstract Art-27

Then he screwed in the screws. He used three screws for each side (which is probably more than necessary but hey, better safe.).

DIY Abstract Art-28

And that, is pretty much that. I’m filing this baby away as a CHEAP + awesome project! The actual cost of this for me was just the price of the frame which I think was about $7. After we hung it up in the bathroom I wanted to make about five more DIY abstract art pieces to hang all around my house. Would that be overkill? Maybe like an abstract gallery wall? It’s just too easy!

I hope this inspires you to go do one of the projects that you’ve been wanting to do… it’ll be worth it!

DIY Abstract Art-29

“How about making your own abstract art from PLYWOOD! Cheap, easy, beautiful! I gotta try this!

Related Posts

  • How to Bleach Wood FurnitureHow to Bleach Wood Furniture
  • How to Install Removable WallpaperHow to Install Removable Wallpaper
  • Kids Closet Makeover with an IKEA Closet OrganizerKids Closet Makeover with an IKEA Closet Organizer
  • DIY Framed CorkboardDIY Framed Corkboard
  • Casual Coastal Master BedroomCasual Coastal Master Bedroom

About Chelsea

Chelsea Coulston is the resident decorator, baker, and pillow hoarder around these parts. A wife to an active duty Sailor and mom of two girls, Chelsea's got a knack for decorating even the most challenging spaces (just see her military base house!) She's inspired by cool beach tones and warm natural elements that remind you of a day at the beach. After living in a half dozen rentals, she's enjoyed spending the last few years in a cute ranch style home that she and her husband have almost completely renovated themselves. Chelsea lives in sunny Jacksonville, Florida with her husband and two daughters.

Previous Post: « Painted Leaves Fall Decorations
Next Post: 5 Minute Fall Craft – Fall Garland »

Reader Interactions

Comments

  1. Krista says

    September 6, 2016 at 5:03 pm

    I love this Chelsea! So pretty!

    Reply
    • Chelsea says

      September 10, 2016 at 11:36 pm

      Thanks, Krista 🙂

      Reply
  2. Melissa says

    September 10, 2016 at 9:31 am

    I love it! Looks great. It’s so nice to have a helpful husband too 🙂

    Reply
    • Chelsea says

      September 10, 2016 at 11:36 pm

      Thanks, Melissa! He’s great 🙂

      Reply
  3. [email protected] Natural Soap says

    September 10, 2016 at 11:32 am

    This turned out looking so good! I am excited to try this myself now. Thanks for the great tutorial.

    Reply
    • Chelsea says

      September 10, 2016 at 11:37 pm

      I’m glad you like it Alicia – it’s a very simple project! I think you’ll enjoy it!

      Reply

Leave a Reply Cancel reply

Your email address will not be published. Required fields are marked *

Recipe Rating


Primary Sidebar

Hi! I’m Chelsea!

I'm Chelsea. Wife to Matt, and mama to P and Millie. I'm a fan of making and decorating things and everything blue + white. I believe that there is no such thing as too many throw pillows. Lover of iced coffee and cocktail Fridays. I'm glad you're here.

Follow Along

facebook instagram pinterest twitter

Search

Home Tour

Archives

  • Privacy Policy
  • Annie the Brave
  • How To Start A Blog
Removable wallpaper is a game changer! A couple mo Removable wallpaper is a game changer! A couple months ago Matt and I spent an afternoon slapping this up on our bedroom wall and it completely transformed the space. It can be super hard to put your stamp on a rental but I’m pretty pleased with the way this room turned out! #rentalfriendly #bedroom #milspouse #diyprojects #removablewallpaper #coastaldecor 
Download the LIKEtoKNOW.it shopping app to shop this pic via screenshot http://liketk.it/36TCW #liketkit @liketoknow.it @liketoknow.it.home
#ad Homeschool/General parent “pro” tip - buy #ad Homeschool/General parent “pro” tip - buy a shower caddy and stuff it full of art supplies to keep your kids from having their markers and crayons all over the place. For real though, this was a game changer. Previously, I had one hard and heavy caddy for all of our supplies that I would plop on the table during our school day but I found my kids constantly getting up to grab a pink crayon or the blue marker. Or at the end of the day things weren’t getting put away properly and the next day we couldn’t find the glue or the scissors. Now, they each have a caddy that they are responsible for. I’ve partnered with @walmart to share this simple organizing solution. The girls keep their supplies together and carry the caddy around to wherever they choose to school that day/minute. I used my Walmart+ membership again to pull this off. I was able to order all the art caddy necessities online using the W+ free shipping, no order minimum (excludes oversized/freight & Marketplace items) benefit so I can limit my time in stores. #walmartplus
Sitting here thinking about everything that’s go Sitting here thinking about everything that’s gotten me through this last year.
1. My family - having my girls home has been everything I never knew I needed. 
1a. My mom - in those early pandemic days, when we didn’t leave the house, she would meet me halfway between here and Vegas. We would sit in the middle of the desert with our masks on and just visit. I needed that so much and I know she did too.
2. My friends - it’s hard to imagine making it through this year without the friendships I have. They’ve carried me. A small group of neighbors here that would meet at the park for some outdoor fellowship and our weekly dinners made life feel a little more normal. Having regular calls with my best friend in FL was gold especially since we can’t see each other. And regular chats with @bykaithanson got me through especially in those early days.
3. Regular therapy - if I wasn’t already going before all this happened I surely would need to now. This all is very heavy stuff and having someone that is outside your circle to talk to is so important. This saves me again and again.
4. Making bread. I started making last year so when it blew up during that first quarantine I was so excited that we all were baking together. Whenever I’m feeling anxious making dough helps.
5. Exercise - this was the year I finally made exercise a priority. I love how much better I feel when I move my body each day. I’m less anxious and I’m more at peace.
6. All the technology that connects us. Marco Polo, FaceTime, texting, FB Messenger, all of it. Being able to reach all of my loved ones with the tips of my fingers has made it a lot easier when I can’t see them.
7. Television - how many shows have we binged this year? I don’t even know but I remember tackling Friday Night Lights in the beginning of the pandemic and being so sad it was over. 
8. This community. One thing I wanted in 2020 was to CONNECT with you all here and that has happened and its been wonderful getting to know each of you!
💙
We’ve been through a lot this year what has carried you? Tag a friend that’s gotten you through. 
Hoping and praying for a truly happy new year. 💙💙
Merry Christmas from our home to yours! I wish you Merry Christmas from our home to yours! I wish you everything good this Christmas and in the new year. 🎄
#ad Fun festive morning with the girls! My girls l #ad Fun festive morning with the girls! My girls love making and baking anything! We made cinnamon roll Christmas trees then decorated them with m&ms and sprinkles. I bought everything from Walmart, used canned cinnamon rolls to make them quick and easy so we could focus our energy on decorating them. Holiday memories made! How are you making memories with your family this season? @walmart http://liketk.it/34rdO #liketkit @liketoknow.it #walmart
I want to hear about your collections!! I don’t I want to hear about your collections!! I don’t collect much but I do have a few Christmas things that I’ve been collecting over the years. These nutcrackers are one. The girls pick out a new one each year. I have a small collection little white village houses and since the first year we were married we bought a peace dove ornament from Pier 1 (Li Bien brand) - they quit selling them so this will be the first in 14 years that we don’t get one of those. What do you collect???

Copyright © 2021 ·Captivating Theme · Genesis Framework by StudioPress · WordPress · Log in

Privacy Policy
This website uses cookies to improve your experience. We'll assume you're ok with this, but you can opt-out if you wish.Accept Read More
Privacy & Cookies Policy
Necessary
Always Enabled