Fall Decorating DIY Harvest Sign
We went to the beach this weekend then I came home and started decorating my buffet for fall. Sounds weird, doesn’t it? Turns out, the beginning signs of fall come in the form of morning fog here in sunny southern California. Although we were greeted with morning fog, it was still warm making it the perfect beach day. No sun barreling down, cool breeze. It was perfect. While we are still enjoying our fair share of sand and salt water, we are also ready for fall. I usually am pretty tame with my fall decorating but I do like to dress up my buffet and other little things throughout the house. This weekend I worked on getting my buffet ready for fall which included several small craft projects that I plan to share with you guys. The first up is my DIY Harvest Sign.
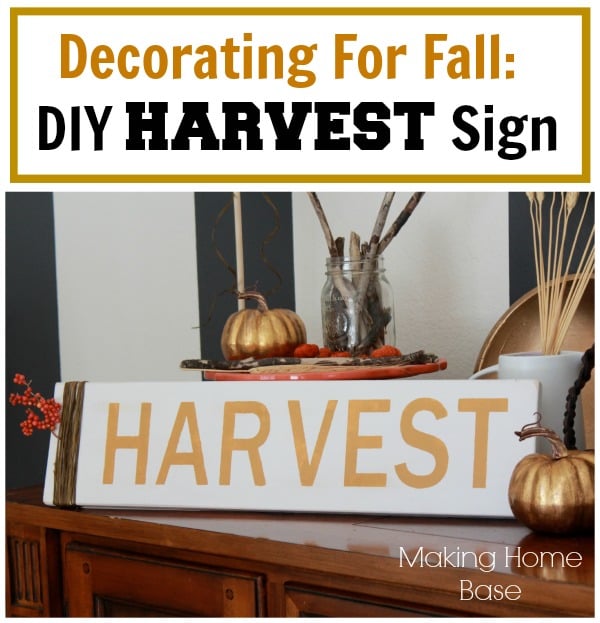 Signs like this are so trendy right now and they are so easy to make. How fun to incorporate them into fall decorating? My sign was whipped up in less than 90 minutes (including dry time). And it gives my vignette a really fresh look. My favorite part about these signs are that you can completely customize it. I used the word “Harvest” but you could easily put whatever world or phrase you’d like in place.
The first step was cut a piece of wood. We had a few scrap pieces in the garage so I just cut it to about 18 inches, sanded it down really good, then painted in white.
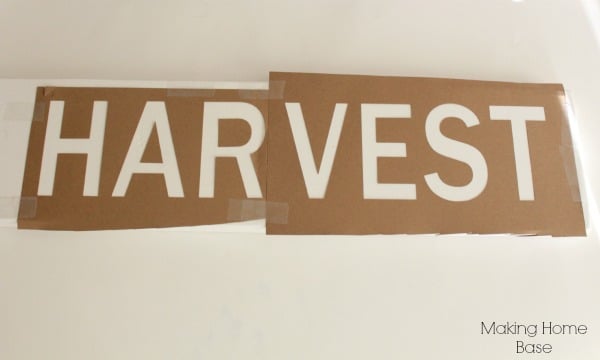 While the paint was drying I created a stencil. My stencil was created with my Silhouette Cameo, making it super fast and easy to make. If you don’t have a Silhouette, the letters in this stencil are large enough that you could easily print the letter outlines out using your printer then cutting them out. It will be more time consuming but definitely doable. Since my stencil needed to cover a 18 inch piece of wood I had it cut in two pieces then pieced it together.
 Once the stencil placement was just right I taped it to the board and got my paint ready. I used Americana multi-surface paint for the letters. The color is the perfect shade of yellow-gold that compliments the white beautifully. My friend Jessica at Mom 4 Real shared a neat trick to put paint into cupcake liners for easy clean up and I’ve been doing that ever since.
 To paint the letters I used a round sponge brush and lightly dabbed it into the paint then dabbed the letters until they were covered completely. After allowing it to try, I took off the stencil and added a little raffia as an embellishment.
 Here’s a little peek of how it looks in my vignette. Don’t you love it! So festive and of course so easy! I may just have to start sanding some more scrap wood for some more of these little signs. They are just so fun to make!
Tell me, how are you going about fall decorating?
Happy Tuesday and happy fall decorating friends.
See more fall projects here.
![Traditional Blue and Silver New Years Vignette [Christmas Vignette recycle]](https://www.makinghomebase.com/wp-content/uploads/2012/12/festive-new-year-vignette-makinghomebase.jpg)


Love your Harvest Sign ~ Pinned!
Thanks Maryann!! Happy Fall to you!
I love the simplicity of the design and the little organic touch with the autumn branch!
your whole vignette is looking mighty cute! 😉
LOVE it Chelsea! Your gold pumpkins look so pretty too… We are back to fall weather here now with cooler temps and rain but I also spent Saturday out swimming and boating – then decorating for fall. Gotta soak up those last days when you can – though I am sure yours lasts a good while longer in Cali!
Love the sign! Thanks for sharing the tip about putting paint in muffin liners – I never would have thought of that!
Love it so much, Chelsea! You always do such fun projects!
And cupcake liners! That is genius!