DIY Bathroom Mirror Frame – How to Frame a Bathroom Mirror
Do you know those builder-grade, jumbo-sized bathroom mirrors that aren’t exactly high style design? They’re pretty standard in any home built in the 90s and they were present in our bathroom. I think they have a very unfinished look but the good news is – they can be fashioned to your taste with a quick modification. When you think about a bathroom update budget – a mirror can take a good slice of the budget. Even the budget-friendly mirrors at Home Goods can cost upwards of $150 or more. A simple installation of a frame for your bathroom mirror is a great option if you want to keep the nice large mirror without shelling out a bunch of cash. In this tutorial, you’ll learn how to add a frame to a bathroom mirror using trim.

How to Frame A Bathroom Mirror
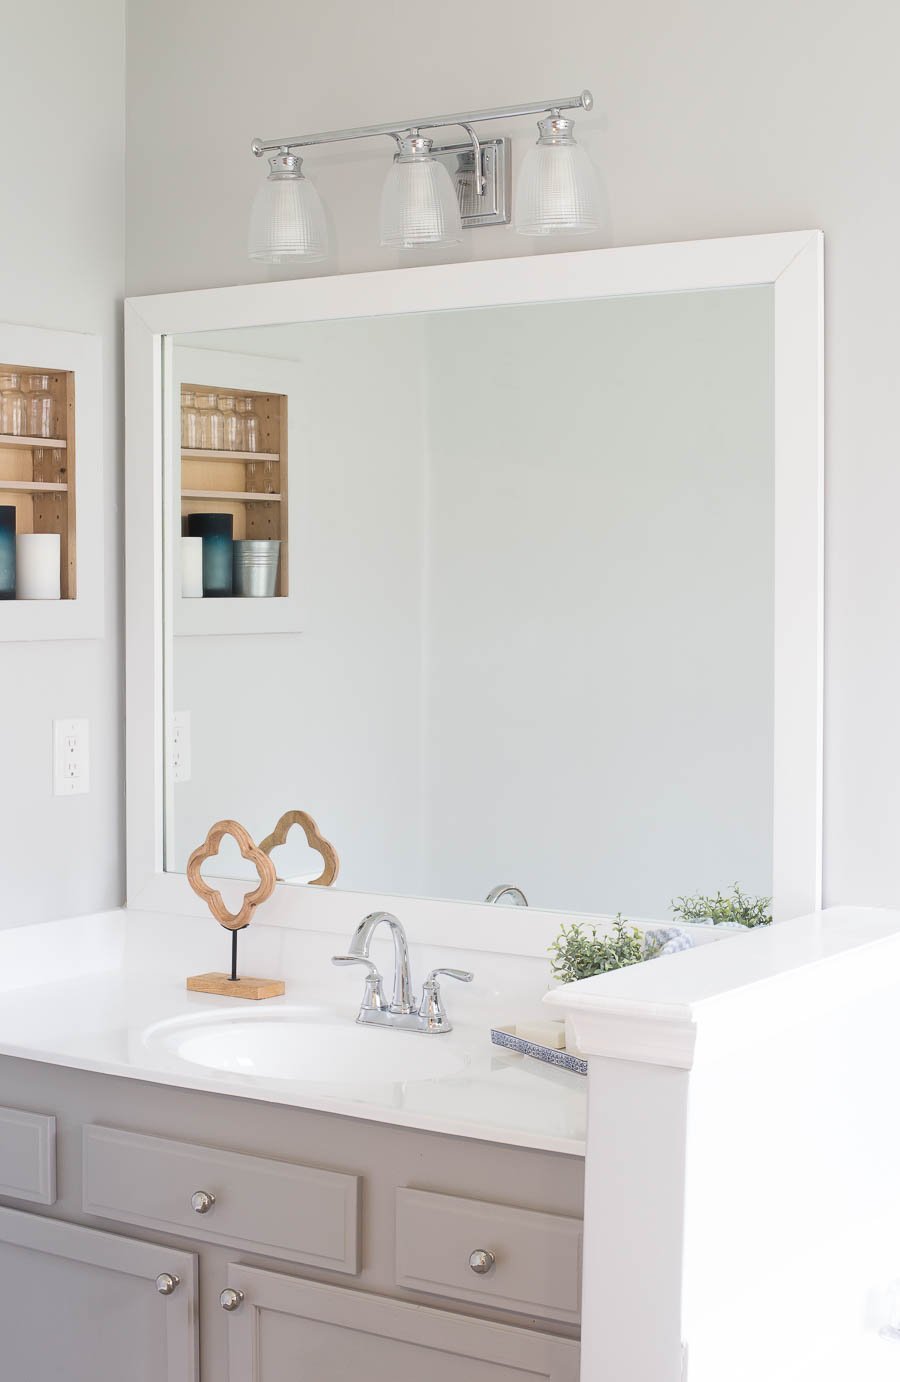
Mirrors can be insanely pricey and getting them hung is tricky too because they can quite heavy. In this particular space, we weren’t replacing the vanities so it made sense to frame the mirrors that were there to keep the mirrors proportional with the vanities. If we were changing out the vanities and had a larger budget, perhaps we would have considered changing out the mirrors but, I am actually really impressed with the way this turned out for just $40.
DIY Bathroom Mirror Frame
For our latest bathroom renovation, instead of replacing the bathroom mirrors – we decided to update them with a DIY bathroom mirror frame. (PS. If you didn’t catch the big ol’ bathroom reveal, head over here first and check out the pretty stunning before and after.) We framed these two vanity mirrors for less than $40 in wood. For the price of one small-sized hanging mirror, that you’d find at Home Goods, we DIY framed out two huge bathroom mirrors, in an afternoon. In the tutorial below I’ll show you how to frame a bathroom mirror!
Our main bathroom had two separate vanities with their own huge builder-grade mirrors. During our bathroom renovation, we painted the vanities and re-glazed the countertops and bathtub. After those updates, it was clear that we needed to do something to upgrade the mirrors. I actually loved the size of the mirrors, they are proportional to the vanities but buying a replacement of this size would have been super expensive and it didn’t make sense to get rid of perfectly good mirrors just because they lacked frames. We had a goal to keep our bathroom makeover as budget-friendly as possible. To keep on budget, it made sense for us to update the builder-grade bathroom mirror by adding a frame.
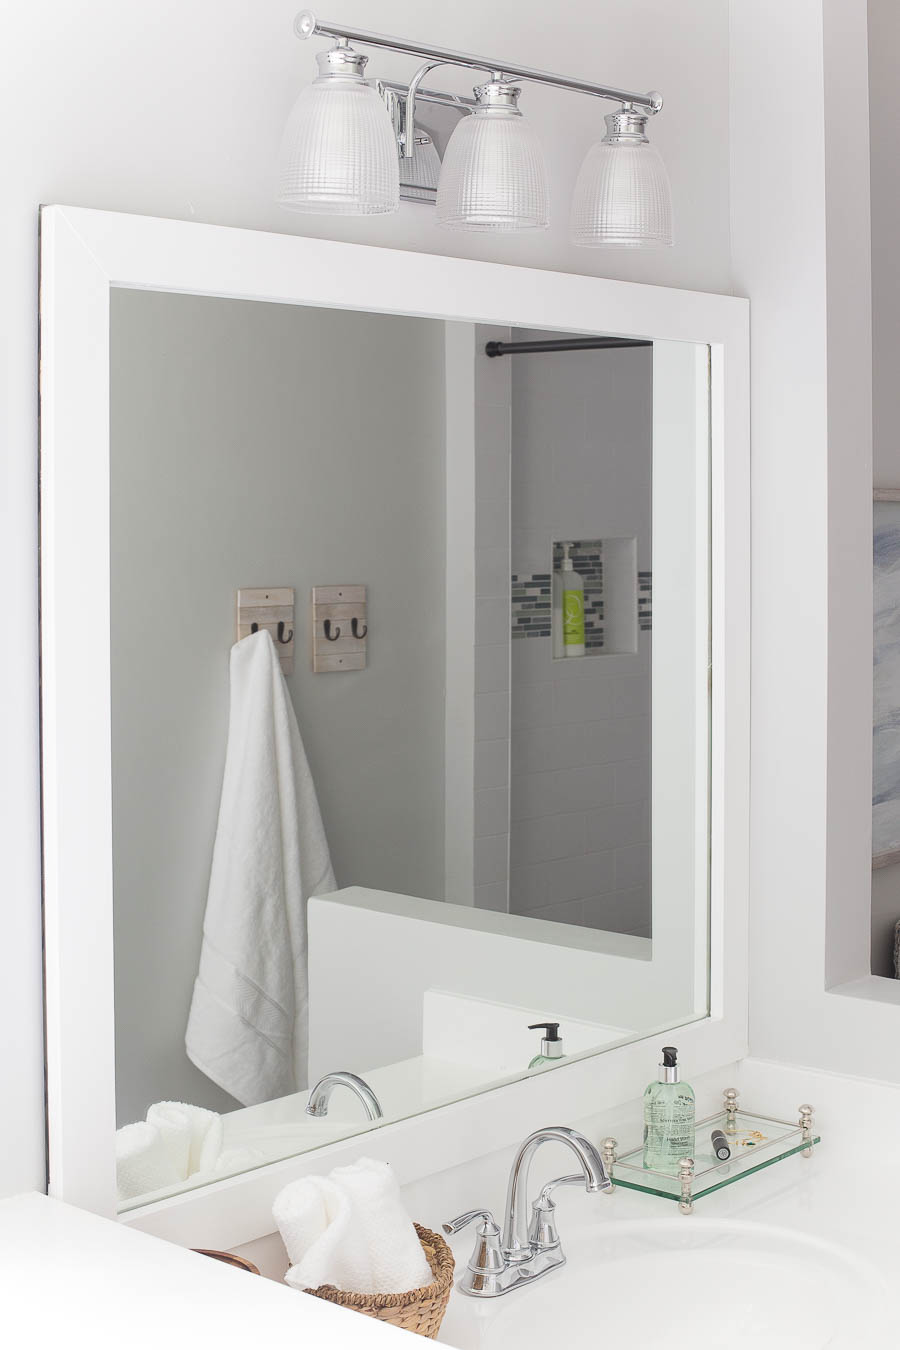
Listen, this was a really easy home improvement project. Matt and I were able to knock out both frames in an afternoon including a run to Home Depot for supplies. The mirror frames came out really nice and professional-looking. I’m really happy with the white paint. The vanities go so nicely with the rest of the renovation. Here’s a quick tutorial on how to frame a bathroom mirror.
How to DIY a Bathroom Mirror Frame
Project Supplies Needed
1×3 boards (to your measurements – we used 4 8ft pine boards)
Tape measure
Chantilly Lace White Paint (or wood stain if you prefer)
Dremel (to notch out for mirror clips)
Liquid Nails – or other construction adhesive
Caulking
Instructions For Building A Bathroom Mirror Frame
The first step is to measure your vanity mirror length and width. Using your miter saw, cut your wood at a 45-degree angle so the outside portion of your wood piece will be the full length of the mirror (see pic above). Make cuts for all four sides.
Next, sand the wood so it’s nice and smooth, be sure not to sand the angled cuts too much – you want them to fit together flush. Then, paint all the boards white.

(We painted one coat on the back part of the boards so if any reflections appeared in the mirror you wouldn’t see raw wood)
Matt also used the Dremel to notch out a chunk of wood where the mirror clips are (see image above) so that the frame would be flush against the mirror.
Then, we layered out some Liquid Nails all over the back of the frame pieces being careful not to get too close to the edge because you don’t want any of the adhesive to be visible in the reflection or to ooze out of the side.

Immediately, place the board onto the mirror. The outer edge of the frame will be at the edge of the mirror.


Assembly of This Framed Builder Grade Mirror
We put our mirror together like this: top first, left side, bottom, then right side. When putting in the last piece it should fit like a puzzle, nice and tight.
Now you’ll notice there is a small gap where the frame meets in this mitered corner. That’s totally okay! We filled that gap in the next step.
Using a caulk gun, add a layer of caulk to fill the gap.

Matt smoothed the caulk out with his finger, and then wiped off the excess with a paper towel.

Here’s the gap filled. After it dries you can paint over the caulk for a seamless look.
After Photos of Framed Bathroom Mirror
That’s it! That’s how we added a frame to our bathroom mirrors. It was a really simple update that had a pretty big bang for our buck. It’s really an easy DIY project that can elevate your bathroom without a lot of money or a lot of effort. If you have any questions about the tutorial – leave them in the comments below!


Wrapping Up A Framed Bathroom Mirror
Creating something beautiful in your home doesn’t always have to cost a bunch. If you are willing to get your hands dirty and try something new, DIYing projects like this can yield a great result. Creating this frame for a bathroom mirror was a really easy project that had a huge impact on this space. I’m so glad we did this project and I’m thrilled with how it turned out! Let me know if you have any questions!


The mirrors look wonderful – and it would’ve been a shame if you had to replace them and lose all of that gorgeous mirror space. I’ve not done any decor, DIY projects lately. ? But this does remind me that I need to get my mirror for above my dresser hung…now to find the studs. ?
totally agreed!
I did this using windowsw frame moldingng and just did straight cuts. I glued the wood together and let set. I attached to the mirror using Velcro. This way if I want to repaint it later on it comes right off!
This is a great tutorial. I love the idea of updating the existing mirror instead of replacing the entire thing. So much more cost effective! Thanks for the tips- we are hopefully going to be putting them to use in a few weeks on our guest bathroom!
Awesome! It’s a much more cost effective option and I really like a nice large mirror in the bathroom 🙂
Hi there, this is great! I have been looking to do the exact same thing with some leftover 1×3’s laying around. Question though; are there any concerns with just gluing the wood to the mirror? What is a strong enough adhesive to feel safe that it will not fall? Thank you so much.
We used liquid nails and it works like a charm.
Thank you
I love this idea. I am looking to redo my powder room and have a large mirror that I don’t want to take down. So this is a perfect solution of what I need. Although I won’t do myself, it will be a suggestion to the person doing my bathroom remodeling. Thank you.
What color paint do you have on your cabinets?
Hi. Looks great! One question, what did you do about the gap between the new frame and the wall?
Hi Ann, we actually didn’t do anything with the gap because it is really not noticeable. You could add some small trim pieces if it’s is noticeable.
This looks amazing! I am excited to try it in my own home. Quick question, did you glue the wood frame right onto the mirror, or is it glued to the wall?
Thanks!
Hi Emma, the wood frame is glued directly to the mirror – that way it doesn’t damage the drywall if we ever want to swap them out.
how are you going to get to the clips to remove it from the wall if you glued the frame to the mirror?
Great tutorial can’t wait to do this project on our plan mirror. Do you know what color paint you have on your cabinets?
Hi Carolyne, the cabinet color is Toasty Gray by Behr. 🙂
Question! How would you go about removing the mirror from the wall if needed? I’m looking to do this on a smaller scale by framing a mirror I have to look like a window for some living room decor, but I don’t want to have to break the wood off the mirror if it’s glued over the clips like this. Any ideas?
Hey Megan, You’d probably just have to pry the whole thing off the wall and it’s likely the wood/mirror would be damaged in the process. This is a good fix to quickly updating a builder grade option. If you want to replace you’re likely not going to be able to reuse the mirror. Sorry!
We framed our large bathroom mirror with barn wood. But, we made the frame and then we made hooks on the back of the frame with plumbers metal tape that just slide behind the top of the mirror to hold it in place. It works beautiful
How did you “clamp” the boards to the mirror after gluing. I’m afraid they are going to slide as liquid nails says to clamp and has a 24-hour dry time.
Can you use wood molding from Lowes to frame around the mirror to give it more of a design?
What is the thickness of the wood you used to make the frame?
Thanks!
They are 1x2s
Love the look!! I am finally getting around to framing my very large master bath mirror. I want to chalk paint and distress. Do you think I would then need to seal or wax?
Hi Jenn, yes I would wax.
wouldnt it be best to put bottom first,then sides and top of frame last?? Seems top first=gravity with nothing holding up? Also why chaulk vs wood putty? Just asking?
You can do it however you like!
Thank you so much for the tutorial! We can’t wait to get started.