Kids Closet Makeover with an IKEA Closet System
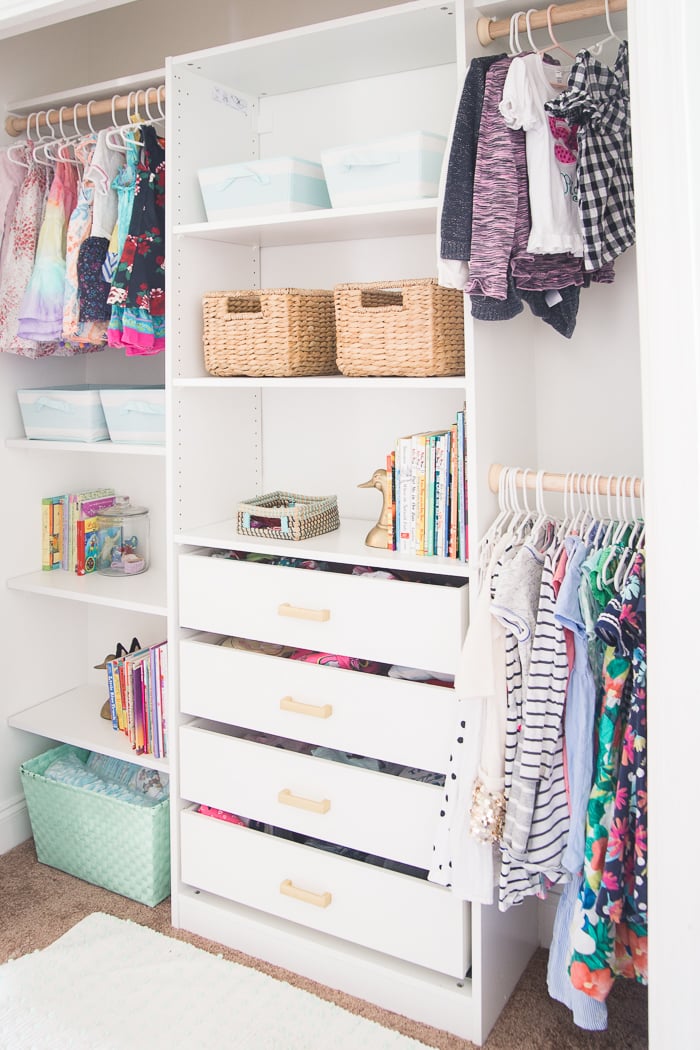
You know when you change something, a routine or a rearrange your cabinets and think – why the heck didn’t I do this before? That’s where I am with this closet. We took a regular IKEA closet system and customized it to suit the girls’ shared closet. It took just a weekend to create it and it made such a huge impact. I think one of the most important details to why this worked out so well for us is that it rang in just over $250 and that $250 was MONEY WELL SPENT, y’all. I won’t hear “Mommmmmm, where is my (insert very specific description of a dress here)?” every single morning anymore because Peighton can now see every single dress she owns at eye level. Basically, this IKEA kids closet organizer upgrade and entire closet makeover is a major mom win.

DIY Kids Closet from an IKEA Closet System
A quick look at the closet for the custom closet project

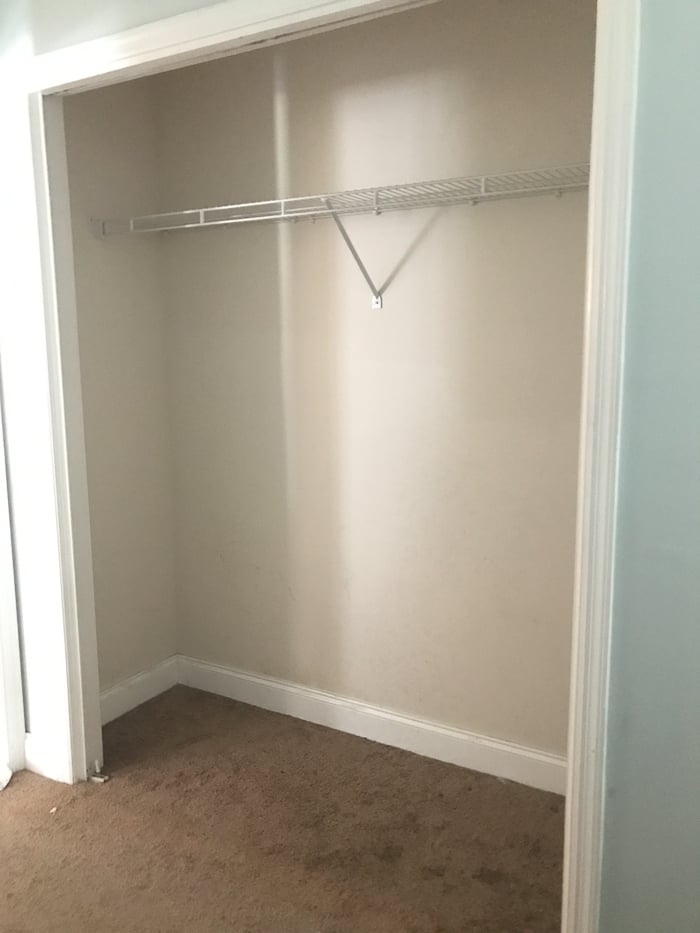
To be perfectly honest, we’ve played a game of musical bedrooms over the last year. Millie and P had separate rooms, then we moved them into the same room which happened to previously be our guest room a while ago. The only problem with the new room was the major lack of closet space compared to the other rooms. Since the closet was completely non-functional, it served as random storage (see what I mean above) while the girls’ clothes were shoved into two dressers in two different rooms.
Deciding Which IKEA Closet System to Use
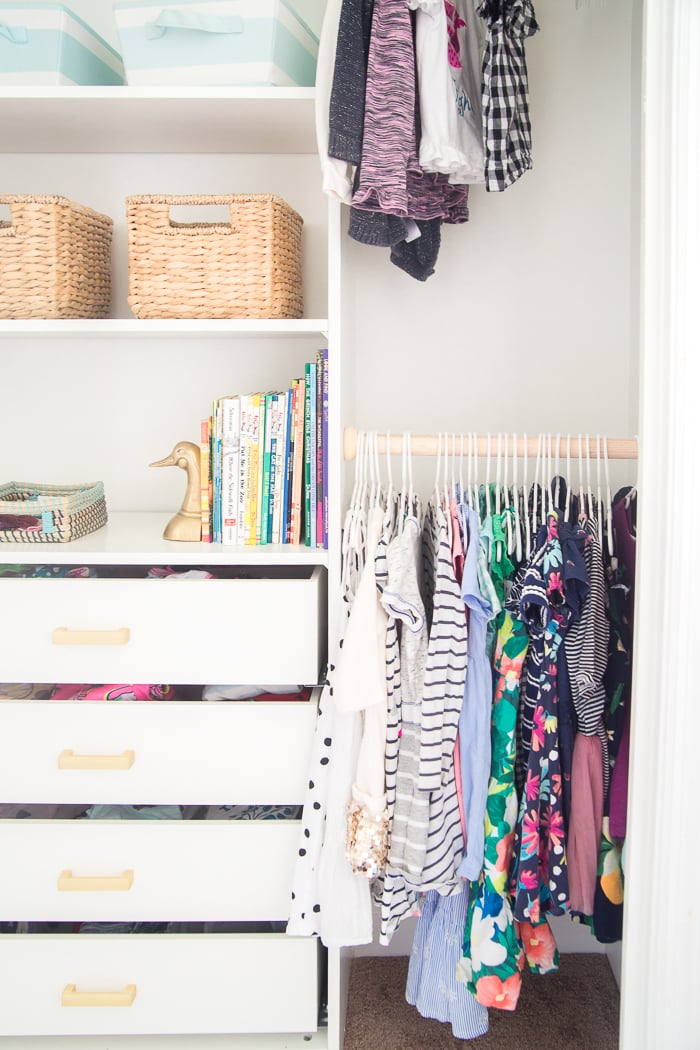
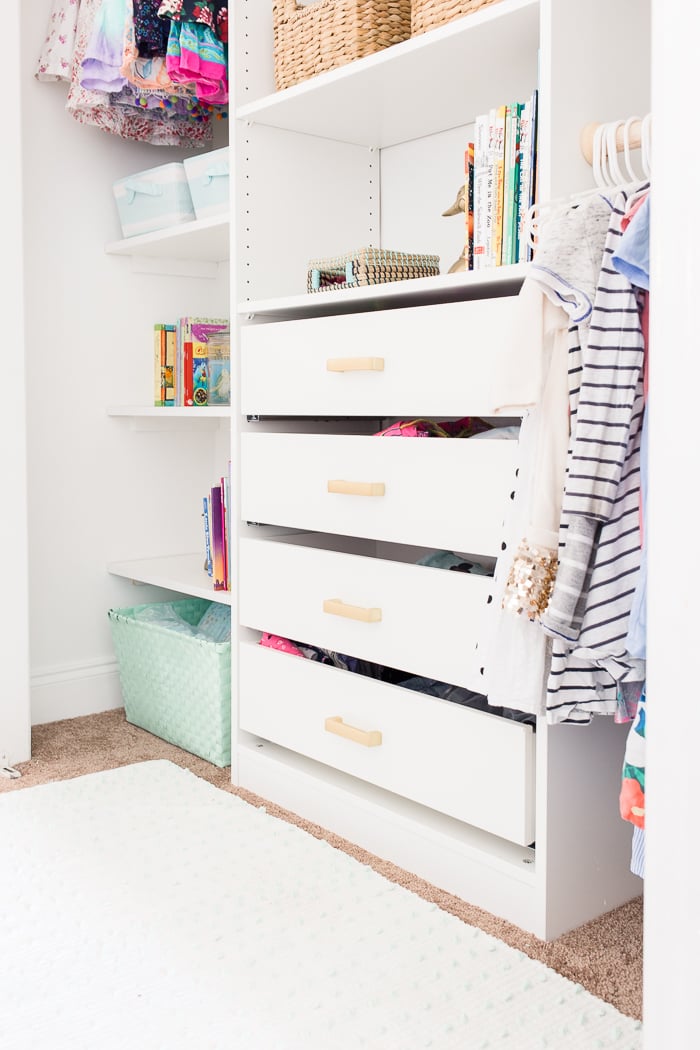
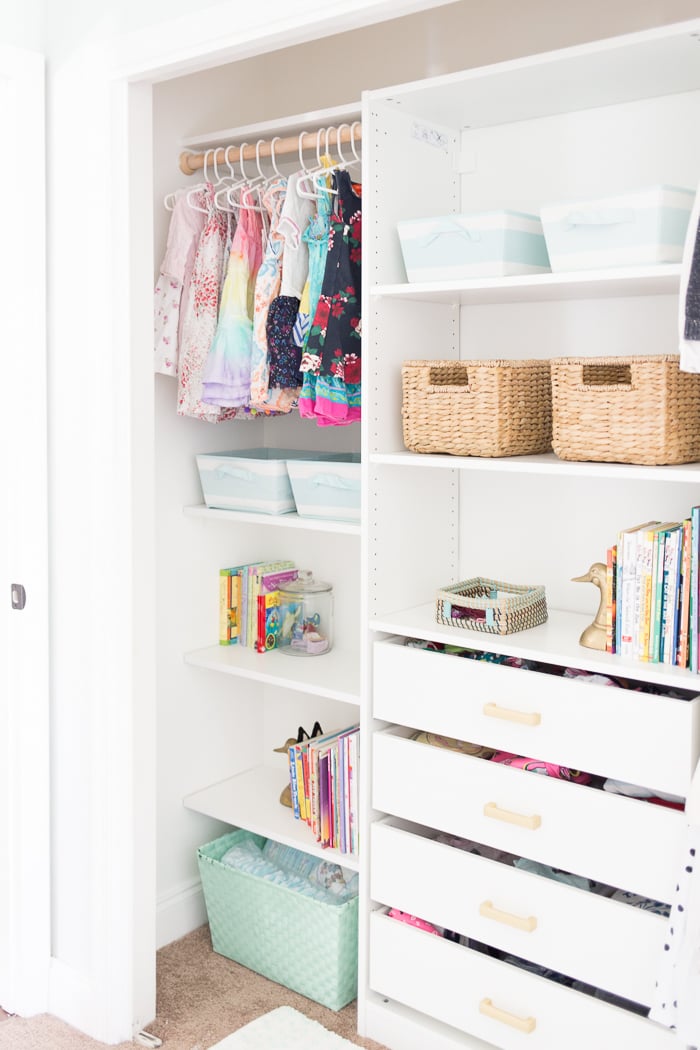
I knew right away I wanted to add the IKEA closet system, PAX, in this closet as the base as their closet organizer and then build shelving around it for books. I opted for the PAX IKEA closet system because I liked the option of having shelves and drawers, I also preferred its size over other closet organizer systems I looked at. Plus, we had a great experience with the DIY Billy Built-ins a few months ago. We considered just building the entire thing on our own but the cost of materials would have been hundreds more than just going with the PAX so it saved us time and money.
If you are interested in organizing a small closet this post is for you! This closet was a standard size at about six feet in width – we were able to get a lot of function out of that space with our IKEA closet organizer DIY that we built.
How to Build a Custom Closet From the IKEA Closet System
We started by removing the old wire shelf then, filled and patched the holes. Matt put the Pax shelving unit together in the living room and together we were able to move it into the closet fairly easily – it cleared the opening without any problem.
Supplies Needed
Here’s what we purchased from IKEA (make sure to check the measurements of the items linked below – there may be a drop-down menu with several selections):
IKEA PAX Wardrobe 29 1/2 x 13 3/4 x 79 1/4
IKEA Komplement Shelf (3) 29 1/2 x 13 3/4
IKEA Komplement Drawer (4) 29 1/2 x 13 3/4
You’ll also need:
A drill
A utility knife
Pre-fabricated shelves cut to size
1×2 lumbar to use as braces
A closet hanging rod
Closet Rod Holders to fit the dowel

Tutorial Instructions
To get the shelving unit to be flush with the wall we had to remove a portion of the baseboard in here.

Once we had the PAX organizer where we wanted it, Matt marked the baseboard on both sides so he knew where to cut. He used a knife to loosen up the boards and then used a hand saw to cut the baseboard and remove it from the wall. Then we were able to fit the shelving in seamlessly. At this point, Matt secured it to the wall with the anchors that IKEA provided.
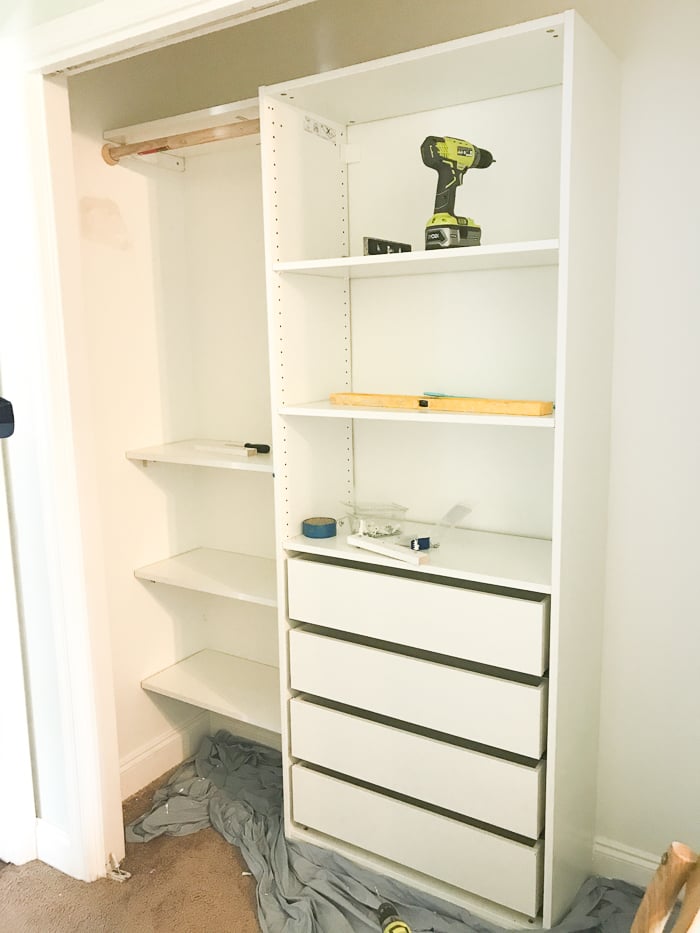
The next step to building out this kids’ custom closet was to build the shelves on either side of the IKEA closet system piece. Matt ran to The Home Depot and purchased a couple of pre-fabricated shelves that were the depth that we wanted and then he cut them to fit the space. We started with the shelf on the top, it was the trickiest because we wanted the entire thing to look like one unit. In order to do that, the top shelves on either side of the IKEA piece needed to be level with the top of the IKEA shelf.
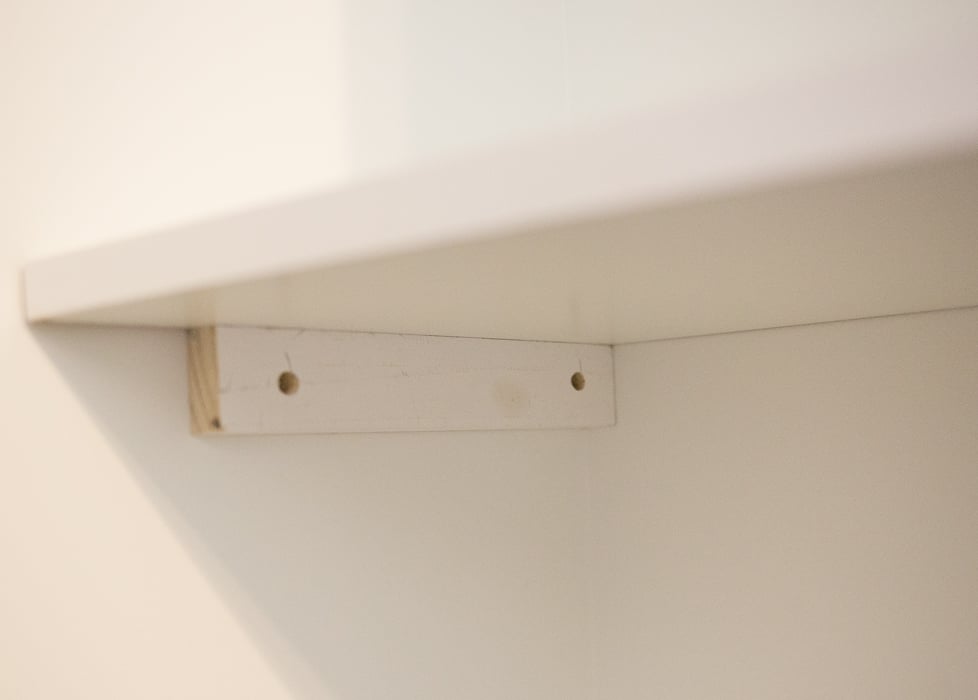
Matt cut some 1x2s to use as braces for the shelves. We used drywall anchors to secure them to the wall. He drilled pilot holes in the braces with a countersink bit so we could hide the screws easily. The braces were also secured to the IKEA shelf with screws as well. We continued this process with all of the shelves. We also decided to add in three closet rods in addition to the shelves.

To finish, Matt filled all the holes and caulked all of the joints so we could prep for paint.
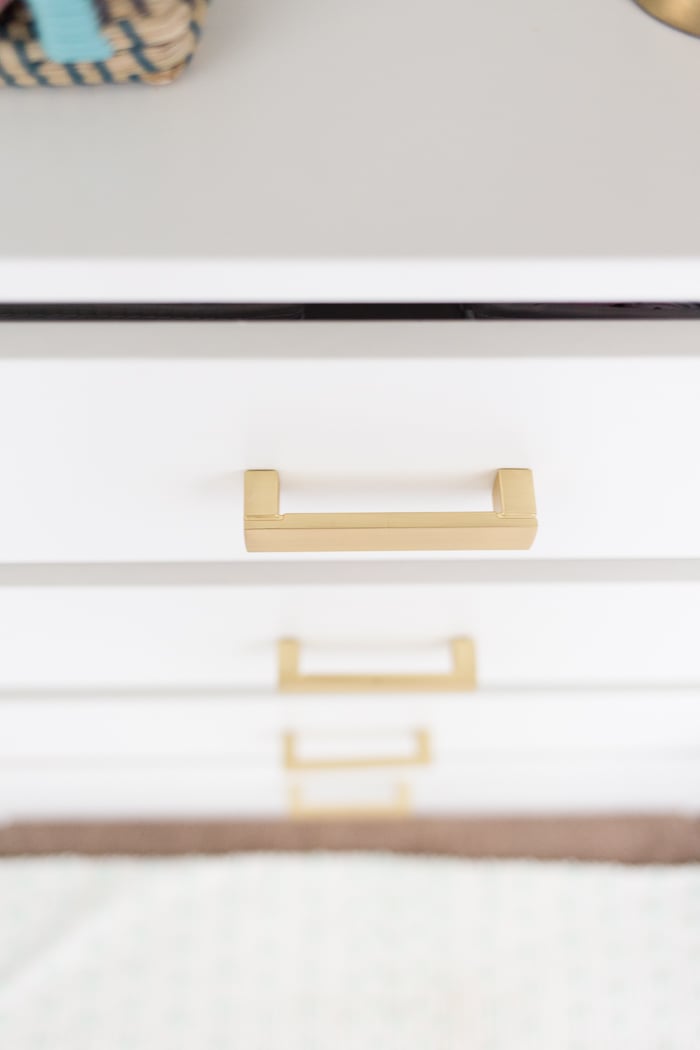
I found this hardware from The Home Depot – I love the gold finish.
The Functionality of a Custom Closet
We’re so pleased with the way this DIY IKEA closet system worked out for us. We turned a completely non-functional space into a custom kids’ closet organizer. This tiny but mighty closet truly serves a purpose.

All of Peighton’s clothes are now out of the playroom and fit perfectly in the drawers here.

She loves that all of her dresses are at eye level and are easy for her to select all on her own.
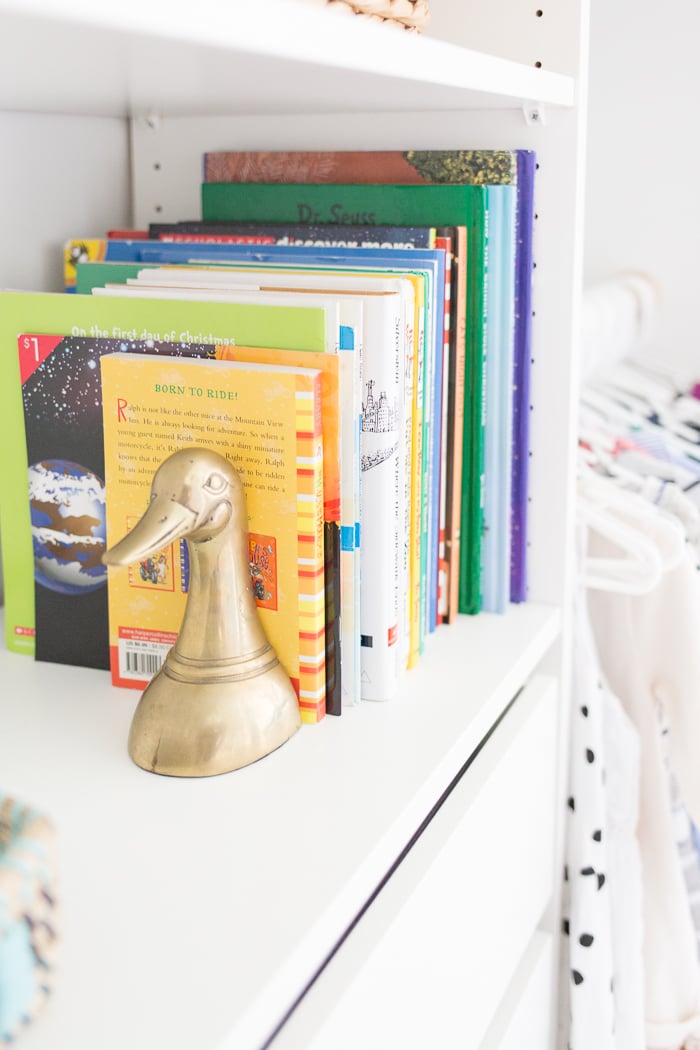
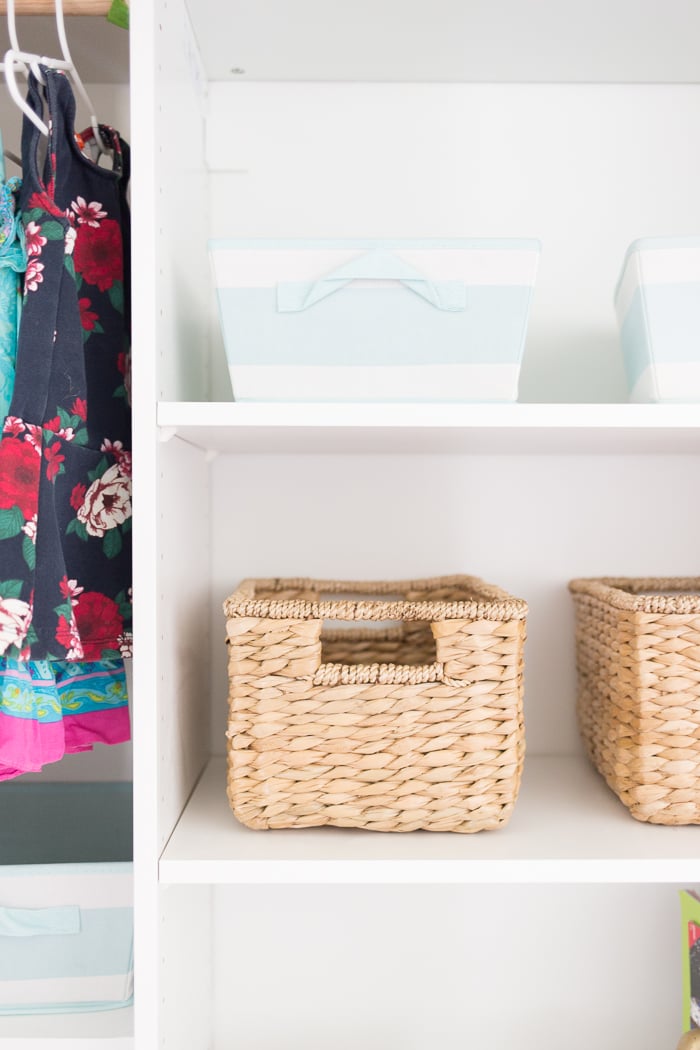
I love that this customized IKEA closet system provides plenty of room for all of their books which means no more mile-high stacks of books on the dresser.
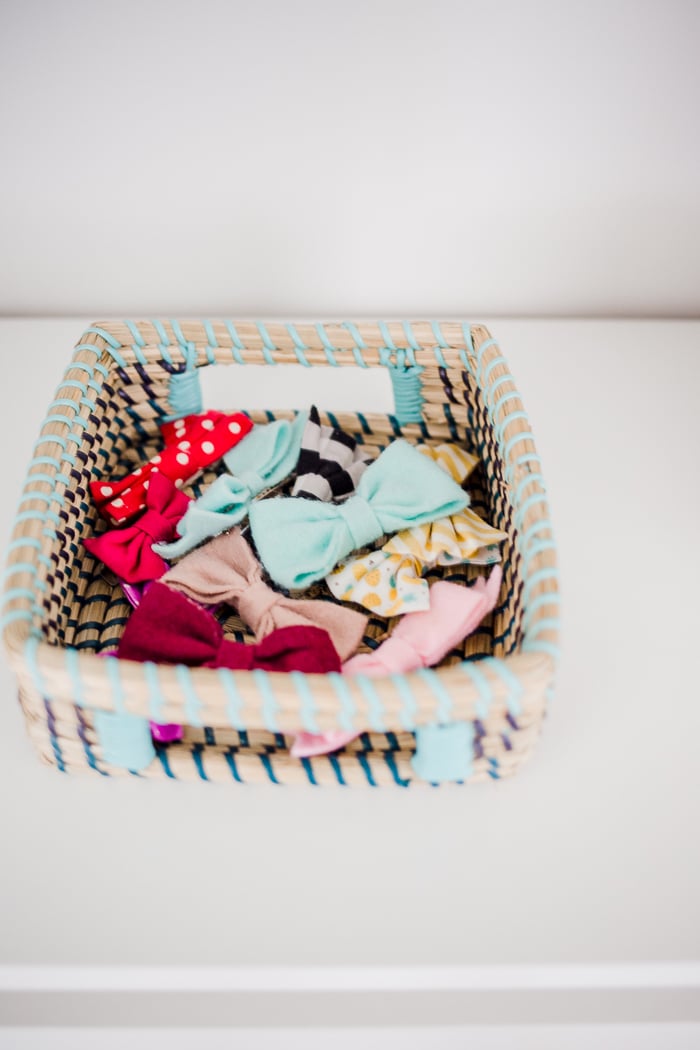
We keep their most-used bows here in a napkin holder I found on clearance. The rest are stored in the bathroom.

Product Sources and Links
Product sources: For your convenience, this post may contain affiliate links. That means, at no additional cost to you, I may make a small commission on your purchase. Click here to read my full disclosure policy.


In Conclusion
It’s really the little things that bring joy, isn’t it? I would never have imagined how much ease would be accomplished by resolving our closet organization issues. A custom closet seems like a no-brainer since it can be done so affordably with an IKEA closet system. Now, the girls have such an easy time finding their things, and everything stays much tidier! Major mom win over here – and did I mention it was a budget project?
If you plan on adding an IKEA closet organizer of your own, pin the image below for inspiration!

If you like this you may also like:
Our customized IKEA Billy Built-in Bookcase


Wow, wow, wow! What a transformation! Before and after pictures make me so happy! Great job turning that closet into something pretty AND functional!
Thank you so much Kristen!
Seeing closet organization projects has to be one of my most favorite types of blog posts. LOL Yours looks fantastic! 🙂
Thank you, Ashley! I enjoy them as well.
Love this!!! My husband and I each have a closet about this size in our bedroom and this is exactly what we want to do to them! I do have one question. The shelves on either side of the Pax unit, are they pieces of wood you cut and painted or are they Pax shelves that you just braced with the 1×2’s? Thank you!
Hi Caitlin, those shelves (the top and the ones all along the left side) are MDF shelving that we purchased as a large piece and cut to size. Sorry, I should have mentioned that!
Chelsea you and Matt need an HGTV show! Seriously! You make this project seem as easy as “oh hey I put a pair of underwear on today”. Do you understand that for dane and I this would end in years of therapy?! ?
HAHAHA! Says the girl who can travel around the world with her husband! Matt and I once tried to kayak together and we almost left in separate boats!
I emailed this to Jamie because I definitely want to do this in Sadie’s closet!! Such a well written, clear, convincing post!! Thanks so much for the work you put into this because I guarantee we’ll be using this post to do this eventually in her room. 🙂
Aw, thank you, Erica! It was definitely a well-worth project. It just took about a weekend to complete and has been a lifesaver!
Amazing transformation! I really want to get (or build) a closet organization system for our girls’ closets. We did ours last year and it was life changing.
It is completely life changing! Saves us so much time in the mornings!
Looks amazing! There are quite a few different PAX options on IKEA’s site, but none that have the drawers like yours in the post. Which one did you choose?
Hi Lindsey – we did the 29 in wide Pax Wardrobe with the 29 in Komplement drawers. I’ll update the post to add this.
You are the best. Thank you!
This looks so good! You’ll definitely get a good return on investment for future home buyers or renters. I want a closet organizer like this!
This is beautiful and functional. This is exactly I want to do for my daughter’s closet. Thank you for the pictures and step instructions as well. This will make my project much easier.
No problem, Tina! If you do try it – I’d love to see after photos! 🙂
Chelsea, how the shelves were connected to the Pax side? Did you also use 1×2 on a Pax side? It looks so beautiful. I am looking for options for my daughter’s room. I wish I had Ikea close but they can ship those items.
Was this question answered? I had to same one!
Tanya and Julia – 1x2s were used on both sides to hold the shelves.
Hi. How did he get it to the pax wardrobe? Is the screw or bolt visible on the inside of wardrobe. We are trying to figure it out. Thank you🙂
The rod? No it doesn’t go through to the pax. Just make sure it’s a short enough screw.
Hi!! This is amazing!! When I look for the ikea pax wardrobe about 300+ come up. Do you have a link to the one you purchased? Please.
Hi Erin,
Here’s the link: https://www.ikea.com/us/en/catalog/products/40211977/
How wide is your closet? Thank you:)
I am wondering the same thing.
LOVE this! This has inspired me to do something like this in all of the closets in the house we’re building at the moment. I am completely novice, so I’m just curious how you attached the rod holder to the pax system. Did you screw right through it from the inside? Is this also the case with the shelf holder on the opposite side? Thank you! Beautiful job!
Hi Ashley, yes we attached them with screws from the inside of the rod holder. If that makes sense.
How did you attach the rods to the Pax? I was told at Ikea that ‘you cant do that’ and that the Pax will break… which is probably a bunch of crap lol. But I was wondering how you installed the rods, and how it has held up? We are installing in our daughters closet this weekend, so I am prepping everything that I need to buy.
Hi Brittney, I’m probably late to respond but yes we drilled right into the Pax. I don’t know why you couldn’t do it. Ours has held up great.
We actually postponed the install until this upcoming weekend, so thank you so much for getting back to me! We will drill directly into the Pax like you did. Thanks for the response!
Hi!
I know this is an older post but do you mind sharing where you found the wood closet rods? And is the PAX wardrobe in the middle or a little off center to make the shelves smaller and rods a little longer? Thank you so much, this is helping me transform my nursery closet 🙂
I also had the same questions, and I too am trying to transform a nursery closet. Could you please share where you found the wooden closet rods? Thanks in advance! 🙂
The wood rods are just dowels from Home Depot – you can also find them on Amazon. A closet rod is typically 1-5/16 in diameter. To hold them up we used these rod holders: https://rstyle.me/+K6ct-STp_HUC_rgthkeH4A
I think we have the PAX shelving/drawer unit centered but I can’t remember for sure
– we’ve left the house so know I can’t measure. But it’s totally customizable so if you need more hanging space you can make the shelving shorter. Hope that answers your questions!
Hi!
Just wondering, did you nail on the backing to the PAX system that IKEA provides, or did you leave it open to the closet wall?
Thanks in advance!
Hi Meagan, we didn’t use the provided backing. Hope that is helpful!
What was the reason you chose not to use it? Thank you!
AMAZING! This post is just what I needed to be inspired to turn my daughter’s closet (aka where she shoves all her toys) into a functional space. I am stealing this plan 100%, thank you!
It really sucks that you linked the 14in deep pax wardrobe frame because I purchased everything you linked and it’s the wrong frame. I built the frame, mounted it to the wall, built all the drawers and the drawers are too deep
Hi Megan, that’s actually the correct frame. Our is the 14 in deep Pax. You may have purchased the wrong drawers. I double-checked the link and see that there’s a drop-down option for the drawers you want (there are several sizes). This is the one I mention in the post : IKEA Komplement Drawer (4) 29 1/2 x 13 3/4. You can email me if you have any issues! chelsea(at)makinghomebase(dot)com
I did the same. Its the wrong link for the drawers:(
The link is correct there is a drop-down menu with size options. You have to be sure to select the correct size. I updated the post to make that point clearer.
This looks amazing!! I’m not sure if this has been mentioned but where is the shoe storage?
Hi Ashley, we kept some shoes (rainboots and others that aren’t worn regularly) at the very top of the shelving but the majority of my family’s shoes are kept in baskets by the front door.
You’ve inspired me to redo our closets! I’m going to start with my daughters room. Wish me luck and thank you for the super helpful tutorial
This is lovely! I read in previous comments you did drill into the pax. The pax isn’t very thick- did you use shorter screws for this, or secure on the other side? Did you feel it was secure? Thank you for sharing!
Hey Dawn, I don’t recall what size screws we used (I believe they were the ones that came with the rod holders) but they were just enough to get the rod holders in place – they didn’t not go through to the other side. Hope that makes sense.
Just wanted to stop by and say thanks for this post! I used it as a guide to redo our nursery closet and I’m in love with how it came out!
Wonderful news!! Thank you! Send me an pic when you can I’d love to see chelsea(at)makinghomebase.com
Looks AMAZING!! did you put doors on it or just let it open?
Hey Stacy – we left it open. We ended up putting a tension rod above and hung curtains.
I am wanting to do this and leave the doors off the closet. How did you like the tension rod curtains?
Hi Wendy, the tension rod with curtains worked well for us!
I’m doing this this weekend! Question, did you attach the extra shelves on the side of the wardrobe to the brackets you made? Or were they floating on top?
Hi Leslie, we just glued it down with some liquid nails then caulked the seams.
Awesome! Thank you!!!!
Hi! Do you mind sharing the length of the closet? I’m wanting to do the same to our closets because you make it look easy and fun, but I’m debating on what’s an appropriate length to leave on each side of the pax system to hand clothes?
Hi Kellie, I can’t say for sure what the width of the closet is because we don’t live there anymore. I will tell you that the PAX piece is 29 1/2 inches and we centered it on the wall so we’d have even amounts of space on either side and both sides were shorter than the width of the PAX my guess is that there’s about 2 feet on either side so maybe 80 inches or so wide. I hope that’s helpful!
Hey Chelsea!
We did it, thank you so much for your blog loved it. I’m so happy with my new closet our new addition to our family.
Hi Melissa, I’m so glad you are loving your new closet!
Hi Chelsea!
The closet exactly how I want it to be for my babies room but I do have a quick question for you. I am not sure if you mentioned it earlier but what was the size of your closet just so I have a better understanding whether I want to go for the pax that 29 1/2 or less wider. Dimensions of your closet would really help. Thank you in advance.
Hi Aneri, I can’t say for sure the size of the closet since we don’t live there anymore but I did mention in the post that it was about 6 ft wide so my guess would be somewhere between 70-80 inches. I hope that’s helpful!
Can you share a link of the Home Depot pre fabricated shelving you got to build the shelves ?
Amazing job and fantastic directions. I can’t tell you how satisfied I was by reading the step by step and then any other questions I needed answered were in the comments section! I am for sure doing this for my nursery. Seriously great job and thanks for taking the time to link everything.
Absolutely! I’m so glad it was helpful!
Did you leave closet doors off or install them later? Thanks!
Hi – we removed the closet doors and added a curtain instead.
Hi! Love this tutorial! You mention after caulking that you were ready for paint. Did you paint the Pax system and shelves all the same color or did you just paint the shelves to match the Pax system?
Hi there, I love this blog post. It’s exactly what I am looking to do for my son’s bedroom closet.
I had a question though: how did you attach the shelves to the side of the Pax wardrobe? I couldn’t seem to figure it out from your photos.
Thanks!
I love this!!! Just wanted to let you know I think you have the wrong drawer depth linked. 🙂
Hi! If you click on the measurement on the IKEA site it takes you to a drop down menu and you can select the depth you need!